Welcome to the Sesam Starter Getting Started Guide.
The Sesam Starter is designed specifically for students and individuals wanting on exploring structural analysis. This starter package serves as an introductory tool, enabling users to familiarize themselves with the user interface and basic functionalities of Sesam. It facilitates the modeling and static analysis of small-scale structural components, such as topside modules and helidecks, utilizing beams and plates. The package is adept for scenarios including transportation, lifting, and in-place conditions. It also allows for member code checking.
What can you do with the Sesam Starter Package
The idea behind the Sesam Starter is that engineers and students can learn the user interface and how to do modelling, structural analysis, and member code check of modest structures.
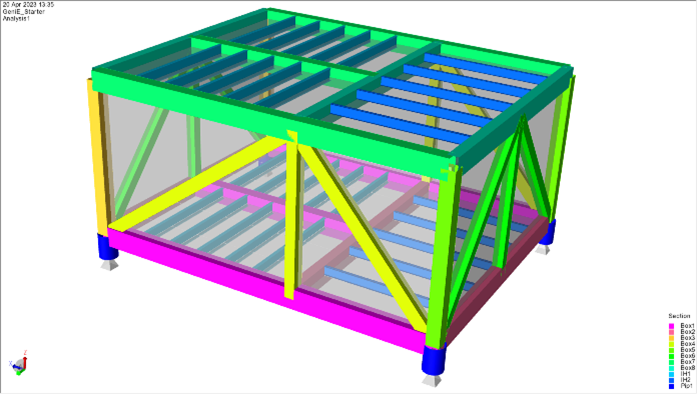
A structure can be up to 100 members (beams or plates) and the analysis model can be up to 1.000 finite elements. The model below is an example with 52 beams and 5 plates.
Fig. 1 Small Topside Module modelled in Sesam Starter
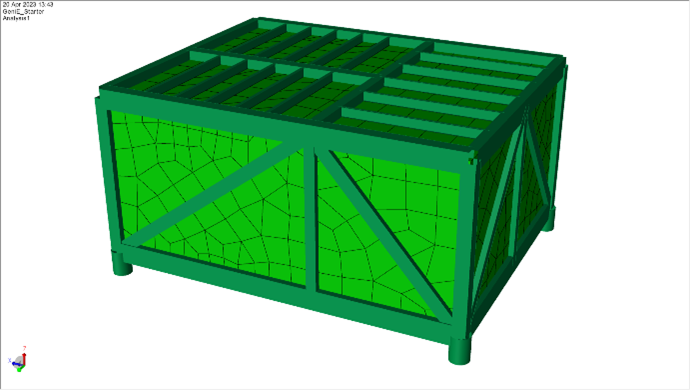
The structural analysis model (the FE model) in this case has 972 finite elements.
Fig. 2 FEM Model of Topside Module
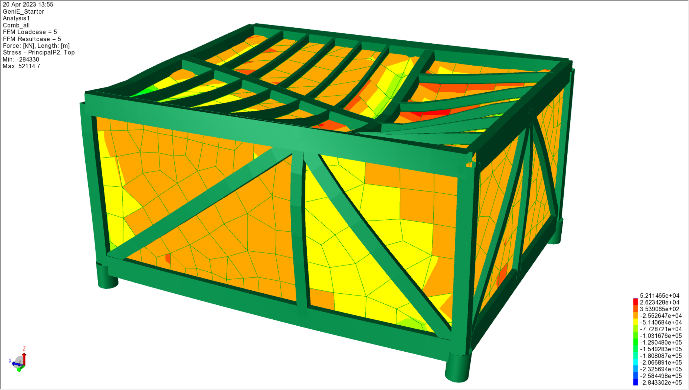
Sesam Starter can be used for early analysis studies of small modules (like in this example), small helidecks, subsea templates etc.
You can look at finite element results like stresses and deformations.
Fig. 3 FEM Results of Topside Module
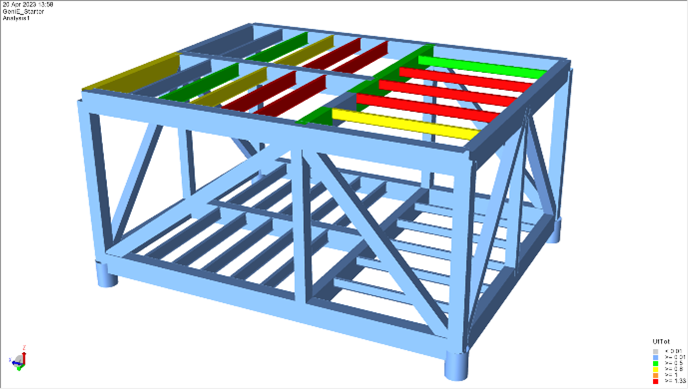
It is also possible to do member code check based on API/AISC, ISO/EUROCODE and NORSOK/EUROCODE
Fig. 4 Beam Codecheck results of Topside Module
The package is free of charge and the usage shall be of non-commercial nature. There is no end-user support from DNV, but you have access to several tutorials you can learn from. If you have proposals for improving Sesam Starter we would appreciate to hear from you at sesam.starter@dnv.com.
If you are an engineer needing more functionality than provided from the Sesam Starter package you can contact our sales staff and request a commercial version of Sesam. Students should contact their universities and ask for an Academic version of Sesam to be installed at the University.
How to download and install on your computer
You need to open Sesam_Portal to get access to both the software and request license file.
To get a license file you click on the link “Request free 3 months usage of the Sesam Starter package”. Alternatively send us an email at sesam.starter@dnv.com.
You need to provide your details including the host-id of your PC. A license file will be sent you (file extension .LIC). This file you need to store in a catalogue C:\FlexLM. Please note that you cannot use another folder name.
Fig. 5 Sesam Portal
Download Sesam Starter Package and install
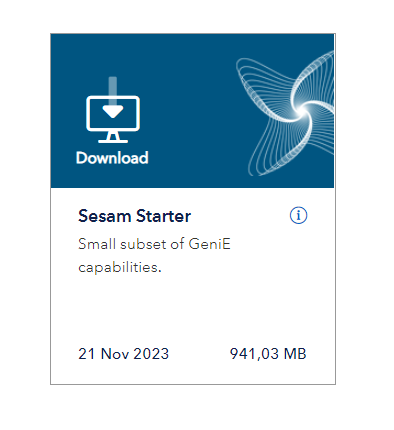
Go to the Sesam_download site and click on the Sesam Starter Package. This will download a zip file to your PC. You need to unzip this file and click-on set-up.exe. This will install the needed software to your PC.
Fig. 6 Sesam Starter Package download page
During installation, you will be asked about the location of the license file on C:\FlexLM.
Please note that you need admin rights to install.
Sesam supports Windows 10 and 11. You are required to have 1 GB storage for the program installation of GeniE.Starter and you should have minimum 1 GB for project storage.
You start Sesam Starter from the Windows Start menu (type in GeniE), from the file GenieR.exe located at the folder catalogue C:\Program Files\DNV\GeniE V8.9-04\Program or from a desktop icon you create based on GenieR.exe.
Learn From Online tutorials
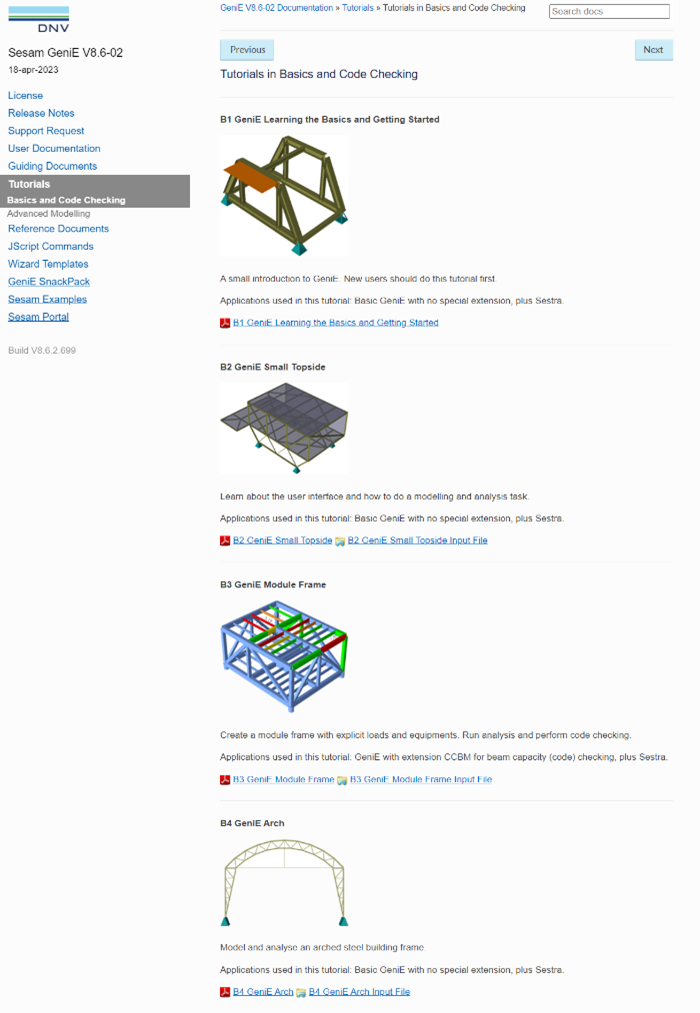
The GeniE installation comes with many tutorials. The Sesam Starter is a subset of GeniE’s capabilities and the tutorials relevant for Sesam Starter are the 4 first basic tutorials.
You find the relevant tutorials B1, B2, B3 and B4 tutorials from help Pages of GeniE shown below.
Fig. 7 GeniE tutorials in Help Page
Test your Sesam Starter installation
When you start Sesam Starter you will see the user interface that is empty.
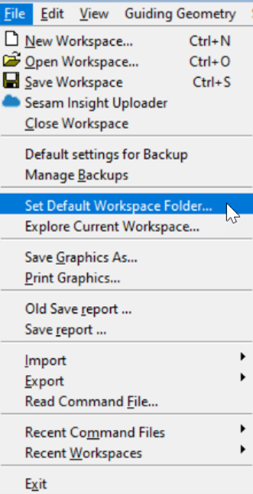
The first you should do is to specify the default location of your projects. In this example the default is set to C:\DNV\Workspaces. You may choose another location, but it cannot be on protected folders like C:\Program Files or C:\Program Files (x86). The selection is now remembered, both for the ongoing session and your next projects. Click on File: Set Default Workspace Folder to specify the location.
Fig. 8 Set Default workspace folder in GeniE
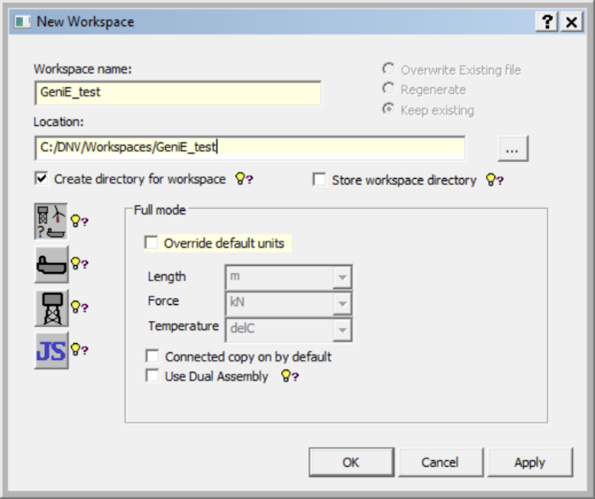
Secondly, click on File: New Workspace to make a project. You can use any name, but it should not have blanks or special characters. In this example, the project name “GeniE_test” has been used.
Fig. 9 Create new workspace in GeniE
Third, download a copy of the Installation_test.GNX (Installation_test) to your PC.
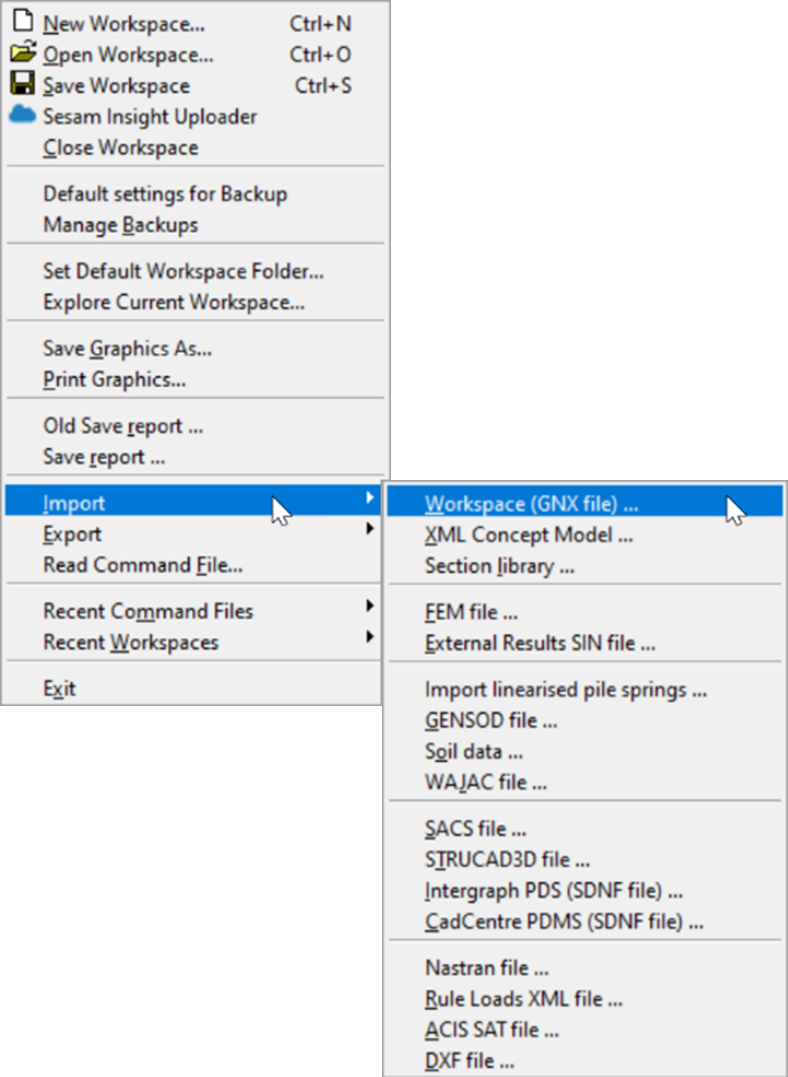
Click on File: Import Workspace (GNX file) and select the file Installation_test.
Fig. 10 Import GNX file into GeniE Workspace
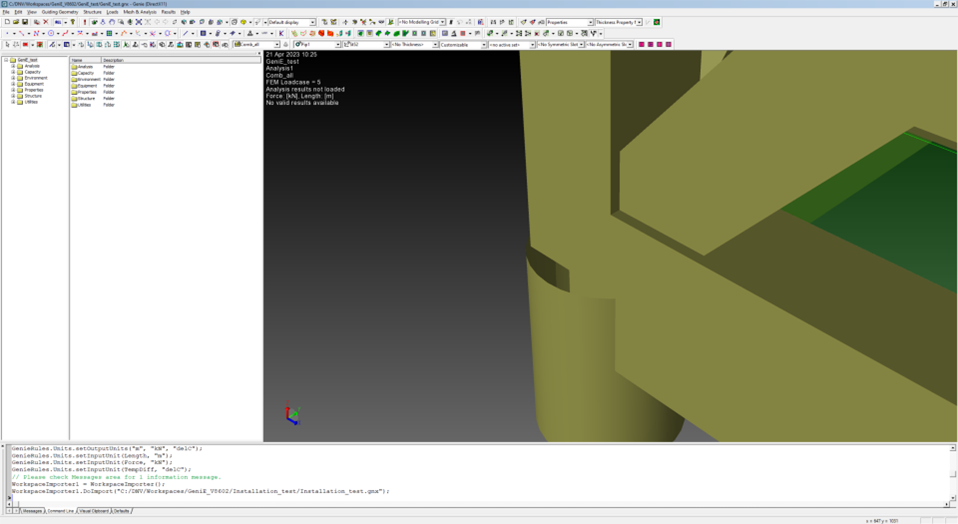
Now you can see the imported model in GeniE interface
Fig. 11 Imported sample concept model in GeniE
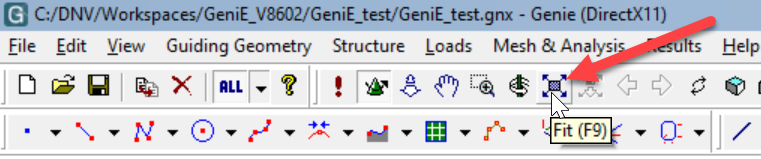
Click on the Fit button to locate all structure in the user interface.
Fig. 12 Fit to View icon in GeniE
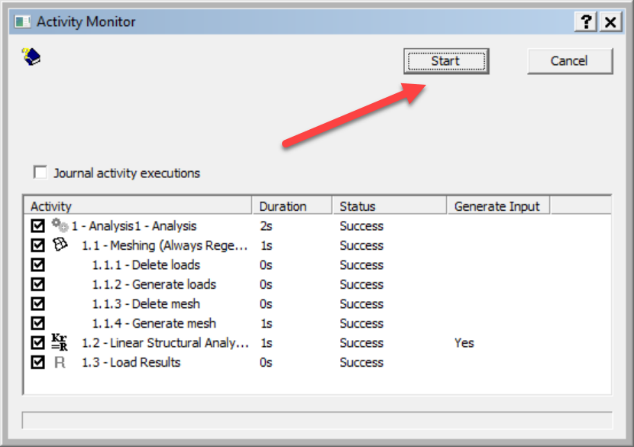
Finally, use the short button ALT+D (or from menu Mesh & Analysis: Activity Monitor) to start the analysis.
Fig. 13 Execute Analysis through Activity monitor interface in GeniE
There should be no warning or error messages from this. If there are, most likely the reasons are that you did not install the license file, or you did not specify a default location for your projects.
You close the session from File: Exit.
Congratulation ! Sesam Starter installation works successfully.