The Nevada Prospecting Tutorial
This tutorial guides new users through the process of prospecting a ground-mount single-axis tracker PV project in Nevada.
Objective
By the end of this tutorial new users will be able to do the following:
- Locate site
- Download background and terrain map layers
- Calculate horizon
- Download climate data
- Set albedo
- Import module and inverter files
- Define tracker system properties
- Generate layout variations
- Export final layout
- Run 3D shading and energy calculation
- Export and review results
Note
Visit SolarFarmer's portal page (https://myworkspace.dnv.com/knowledge-centre/solarfarmer/) and go to the 'Downloads > Demo Data' page to download the files to use for this tutorial.
This tutorial was written for SolarFarmer 1.1. If you are using a later version you may see style and features variations from the screenshots shown below.
Quick video of the tutorial
Introduction
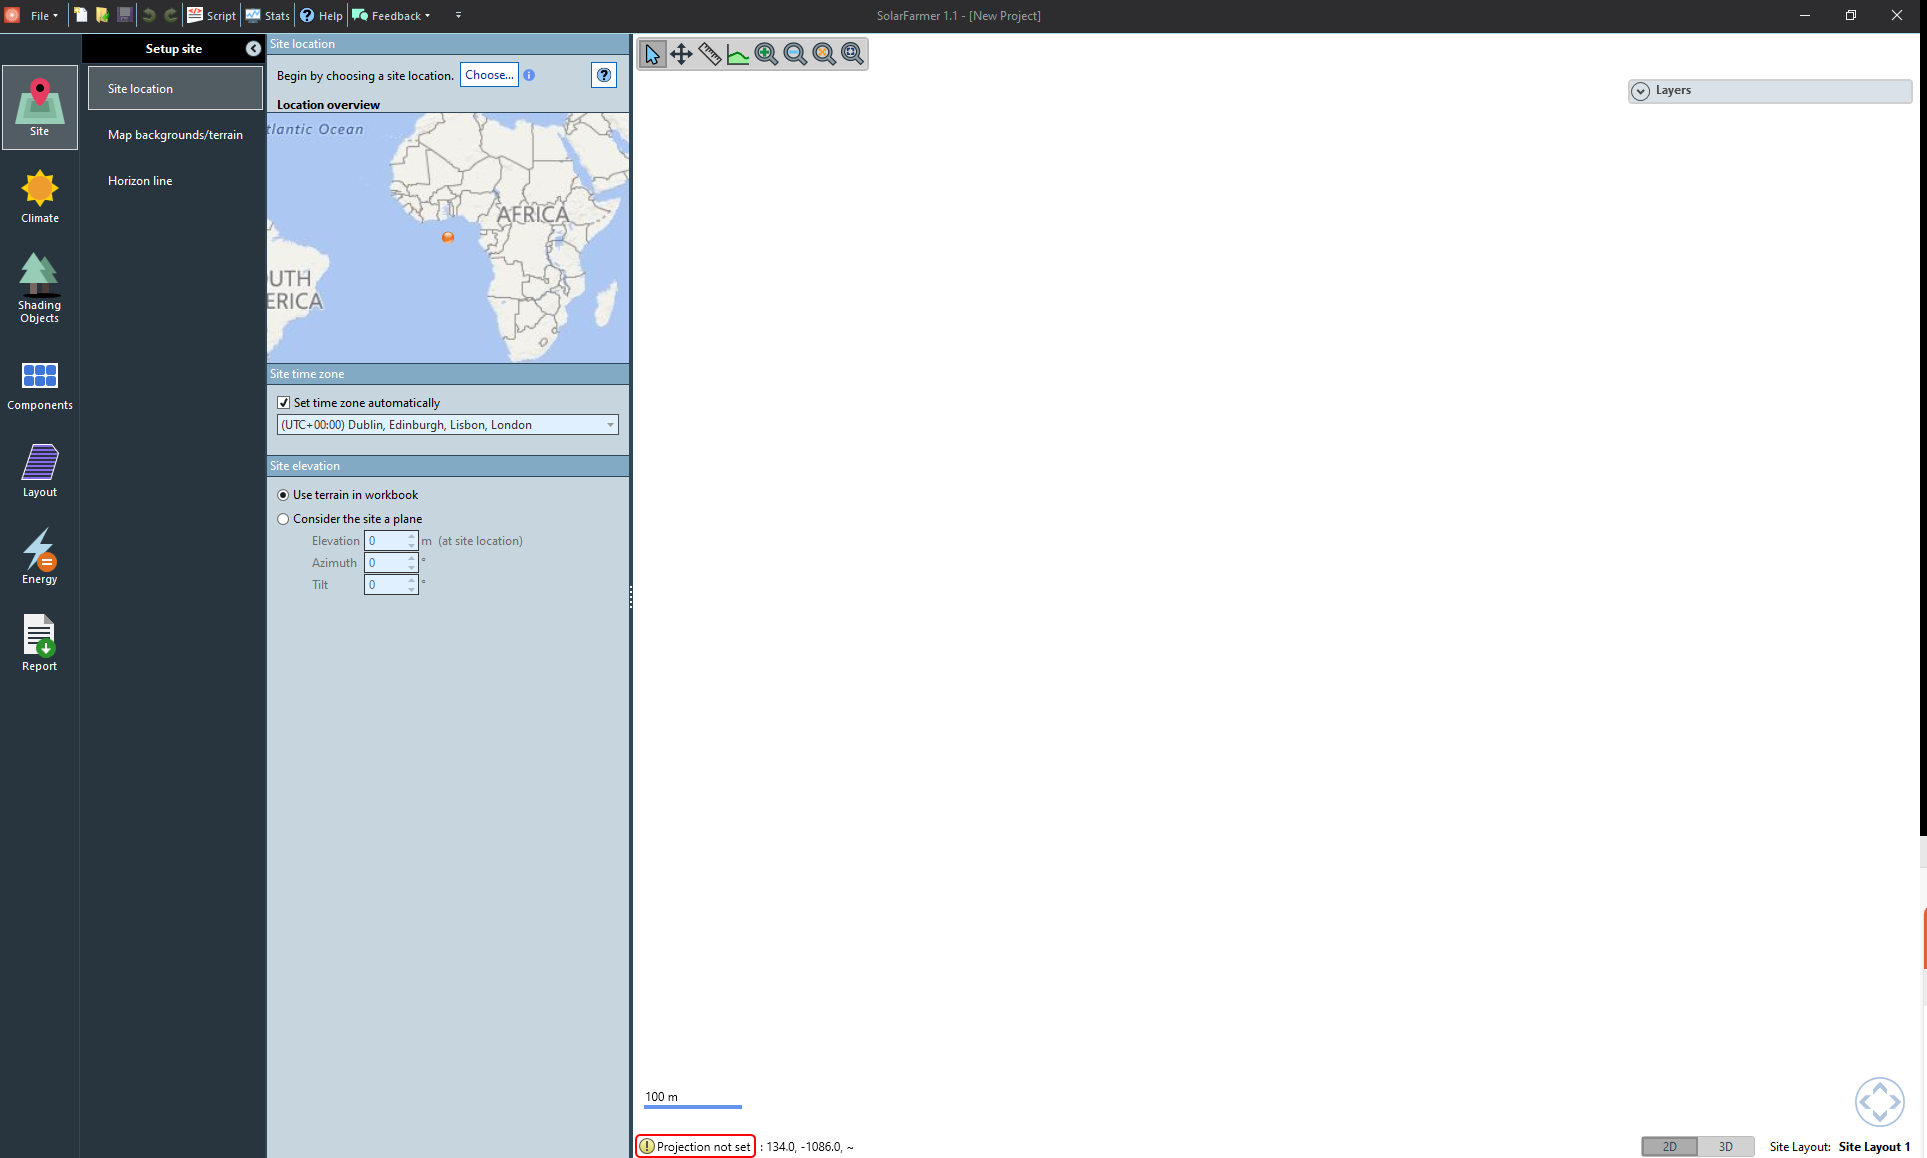
Open SolarFarmer to start a new project.
 Setup site
Define site location
The first page you'll see is the Site location page.
Click the Choose… button to open the location wizard (see image below).
Note
It takes a second for location wizard to come up, and requires an internet connection.
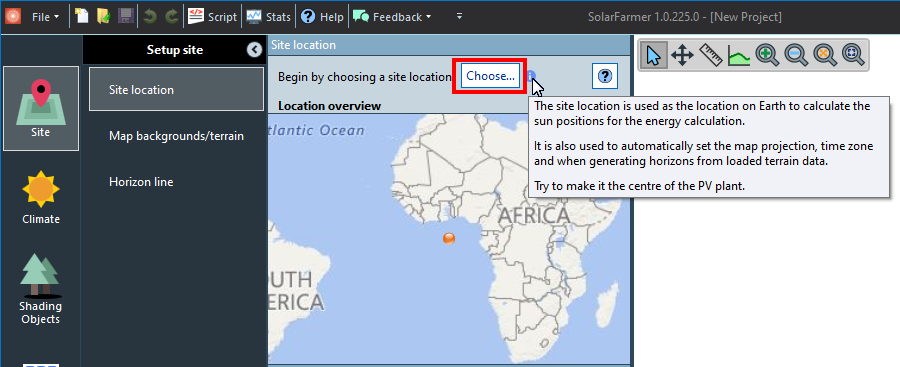
Once the location wizard opens, you need to set a location. There are two ways you can do this:
Search by latitude and longitude
Copy and paste35.619968 -115.391105and then click Set site location at this point.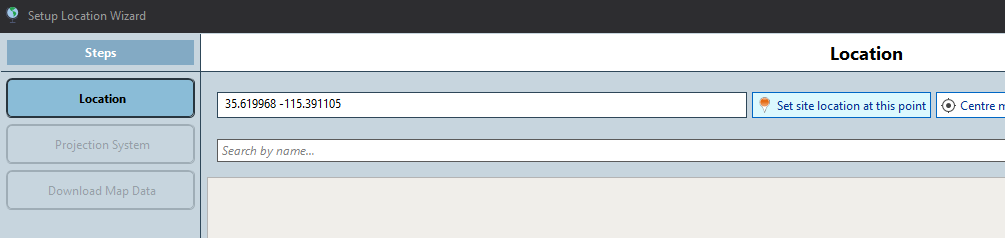
Note
You can also search by place name.
Zoom and pan the map to find the site's location, and ake sure to right-click on the map on the site's location and choose 'Set the site location here' to set the actual site location.
Once you've set the location, click Next to move to the next step in the wizard.
Set the Projection System.
Note
It's recommended to use the default Projection System settings. These have been automatically set by the site location.
Click Next and wait for the Roads map imagery to download.
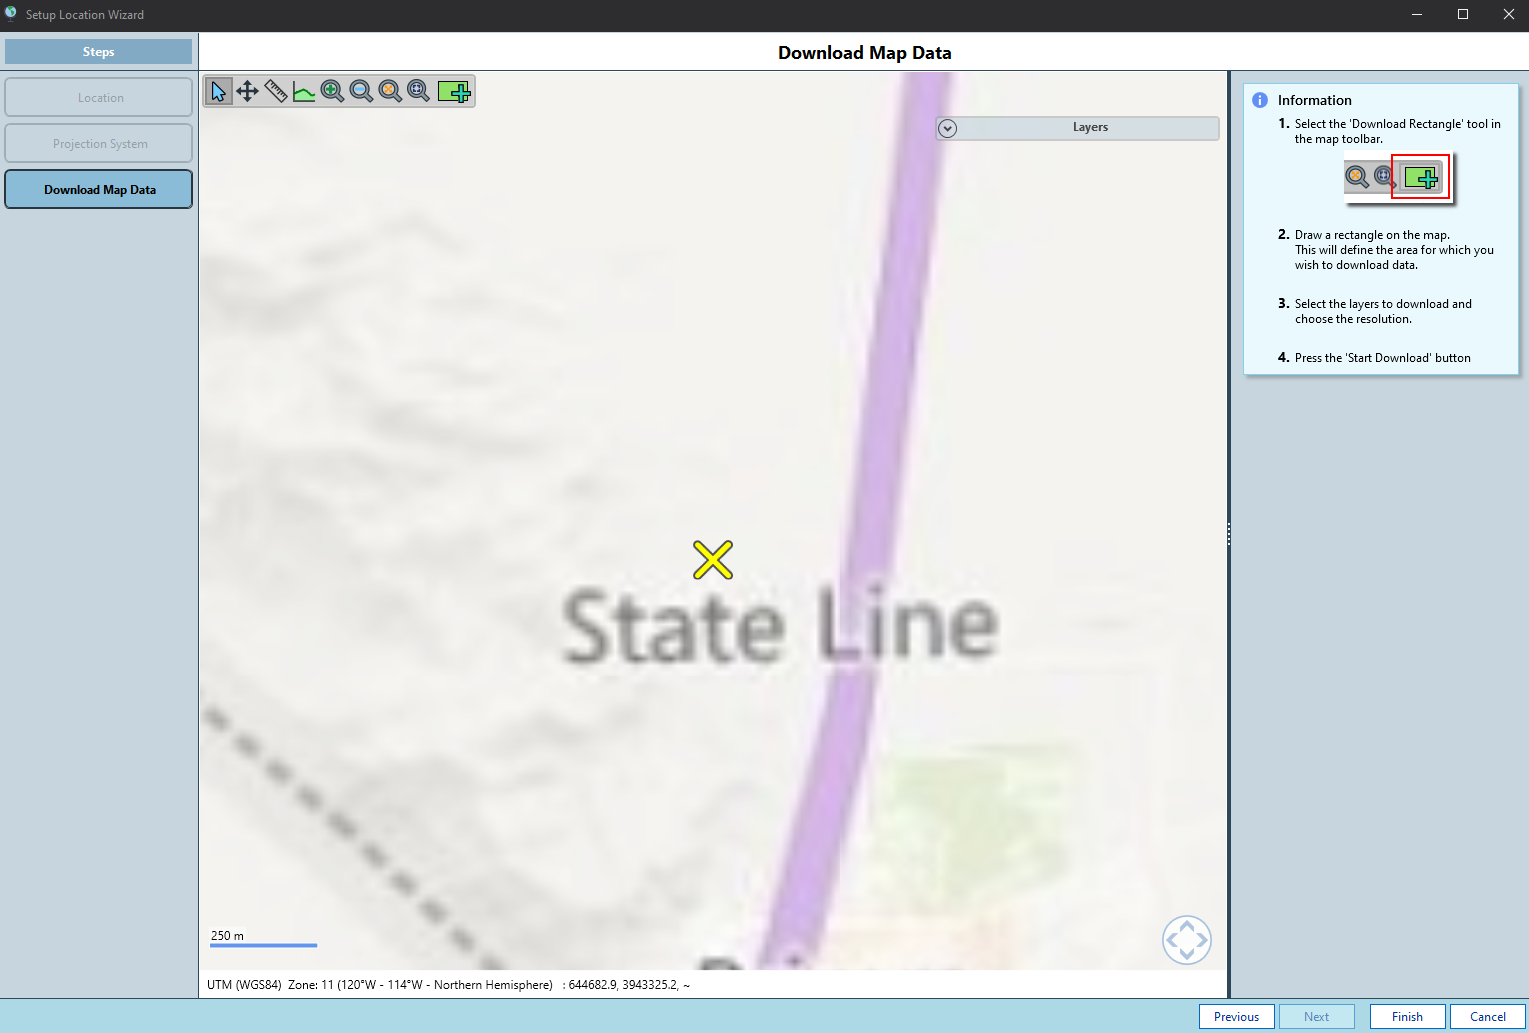
Once downloading has finished, use the rectangle selection tool
 on the toolbar to select
an area approximately 1.5km x 1.5km around the site for which you want to download
detailed map imagery data. Check the options SRTM terrain high res (1 arc-sec) and Aerial imagery.
on the toolbar to select
an area approximately 1.5km x 1.5km around the site for which you want to download
detailed map imagery data. Check the options SRTM terrain high res (1 arc-sec) and Aerial imagery.Click the
 button (you can download more data later if needed).
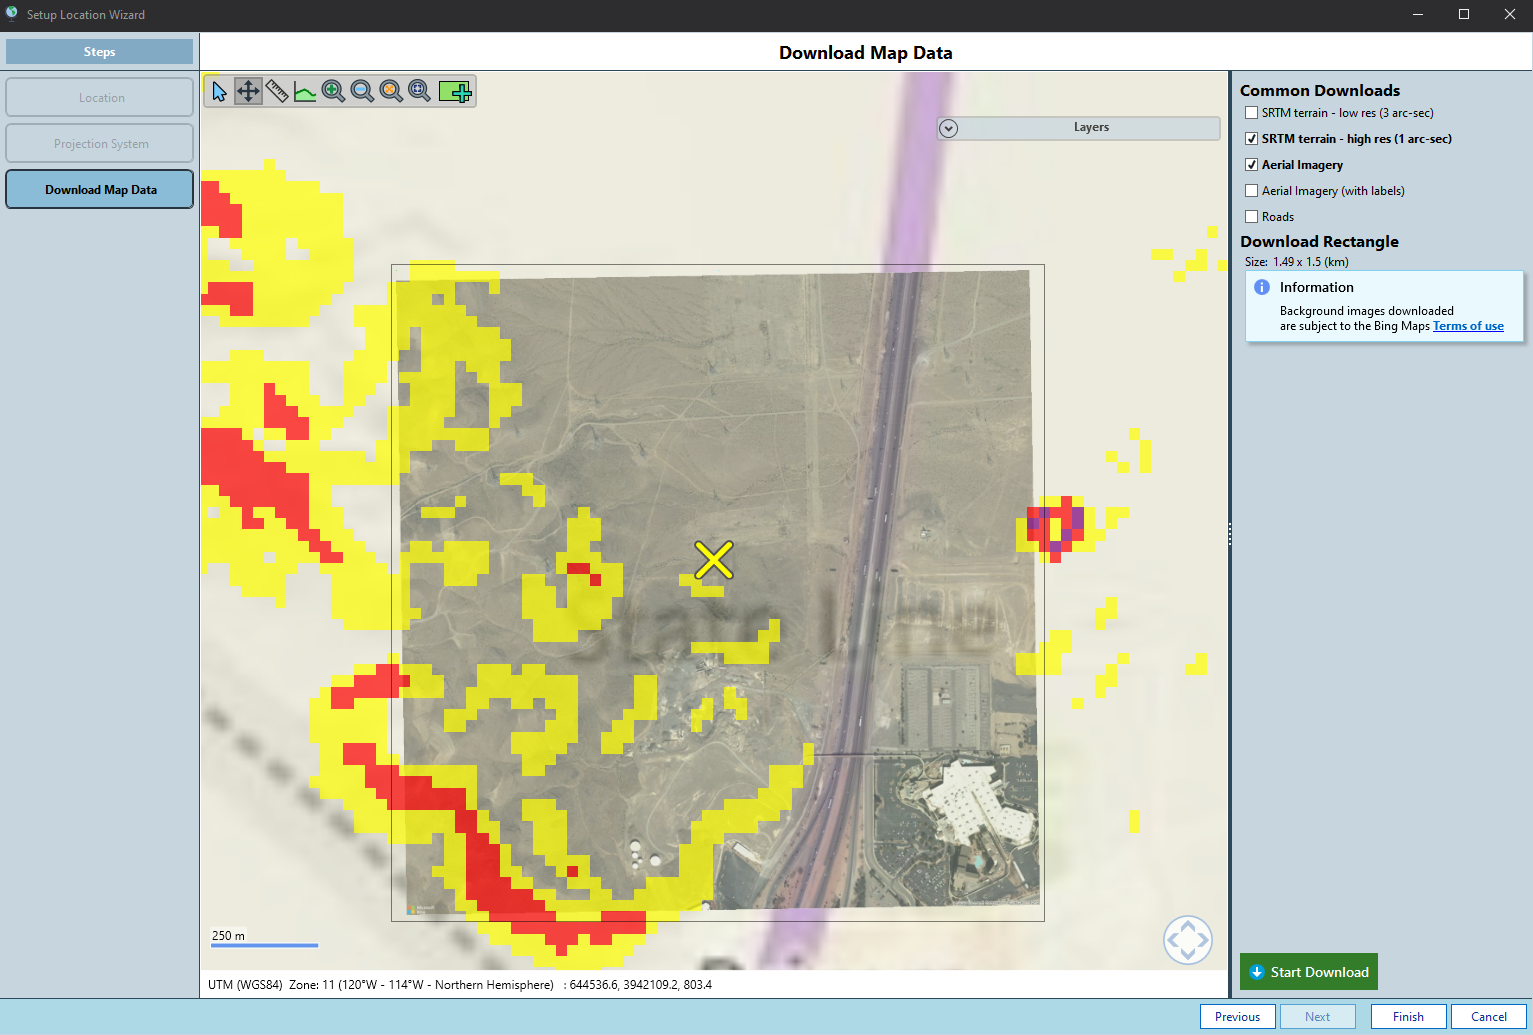
Click Finish to end the wizard and return to site location page.
View Map background / terrain data
On the Map backgrounds/terrain page you can see the files that have been downloaded. The user guide offers a full explanation for Working with the Map, including map tools, layer management and 3D navigation.
Use the Working with the Map guidance to explore the gradient of the site by:
- Identifying slopes indicated by the slope magnitude map layer
- Using the elevation profile tool
 to take slices of the terrain
 Switching to 3D Mode
 and viewing the site from different viewpoints and angles
Note
You can import more background / terrain data in the Map Backgrounds and Terrain task if you need to.
Define Horizon line
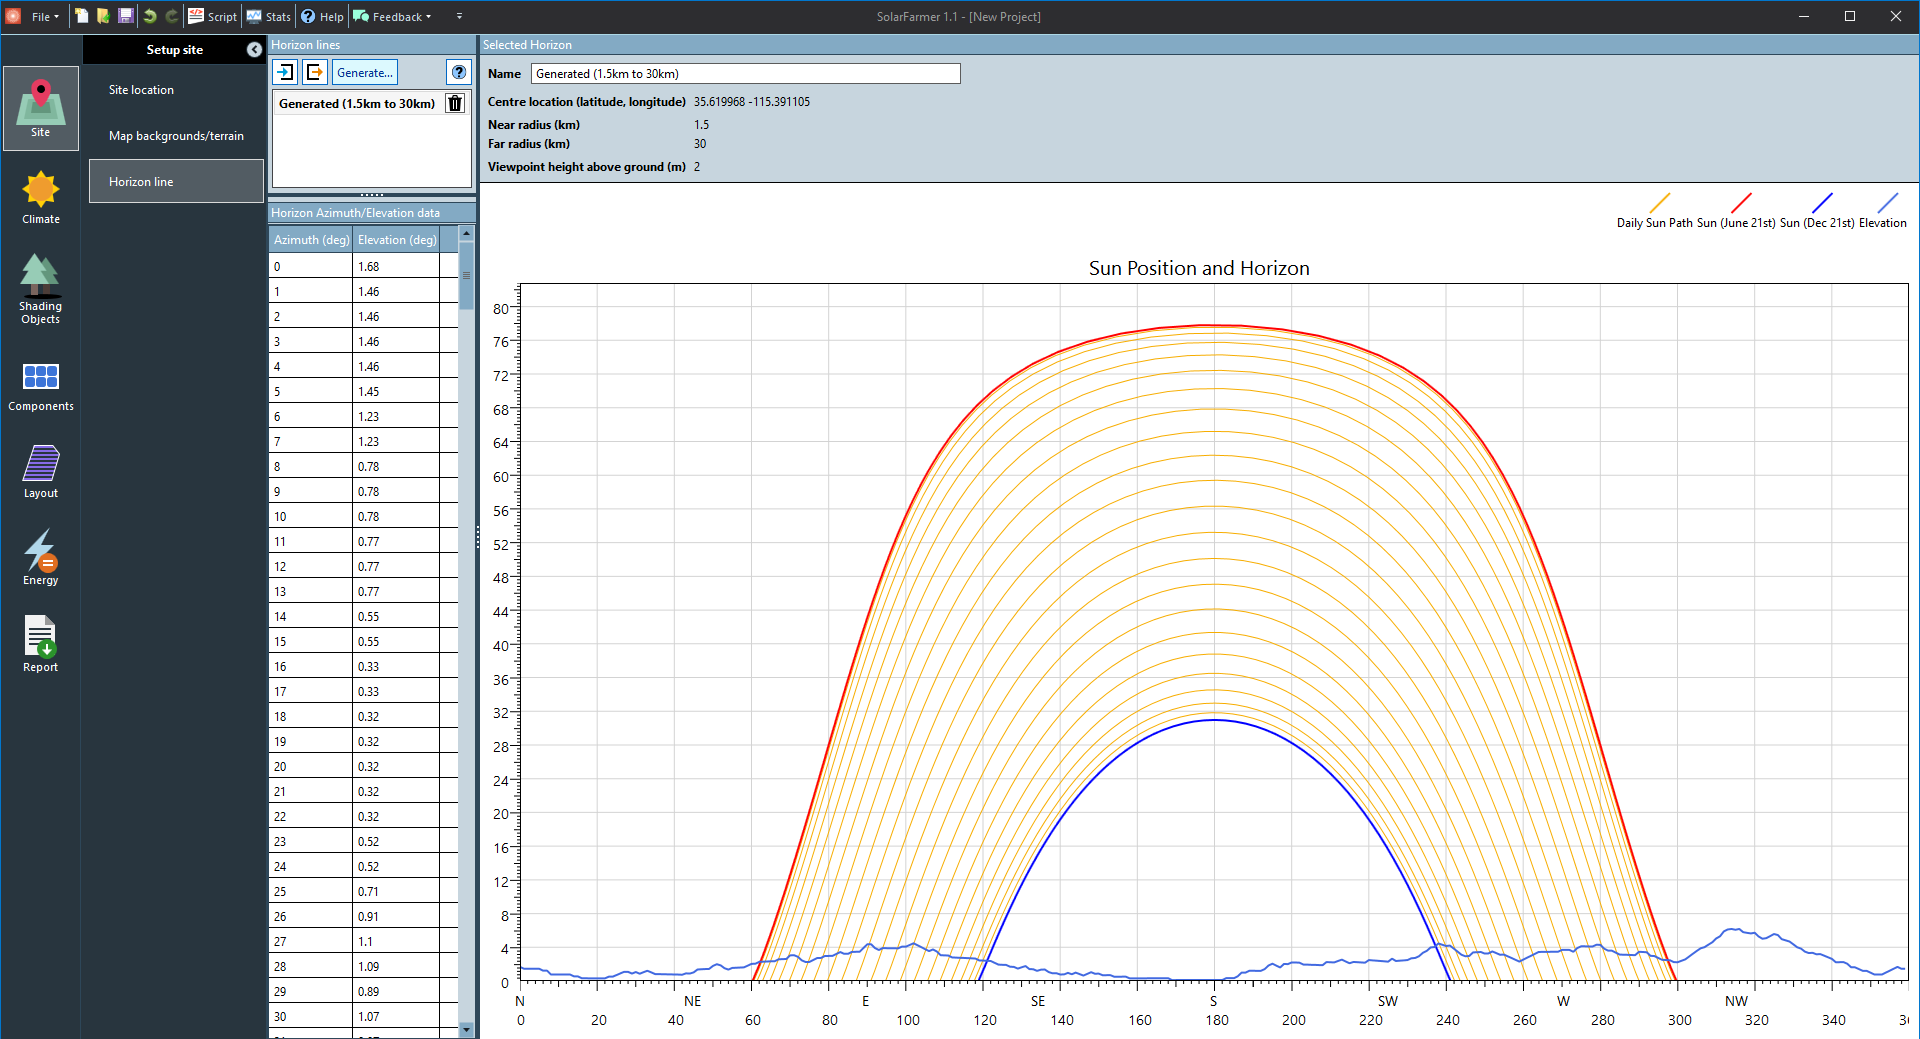
Go to the Horizon line page and click the Generate… button.
Click the Generate horizon button.
Note
You can edit, import, or export horizon data. Consult the Horizon Line page for more details on this topic.
 Define climate and solar resource
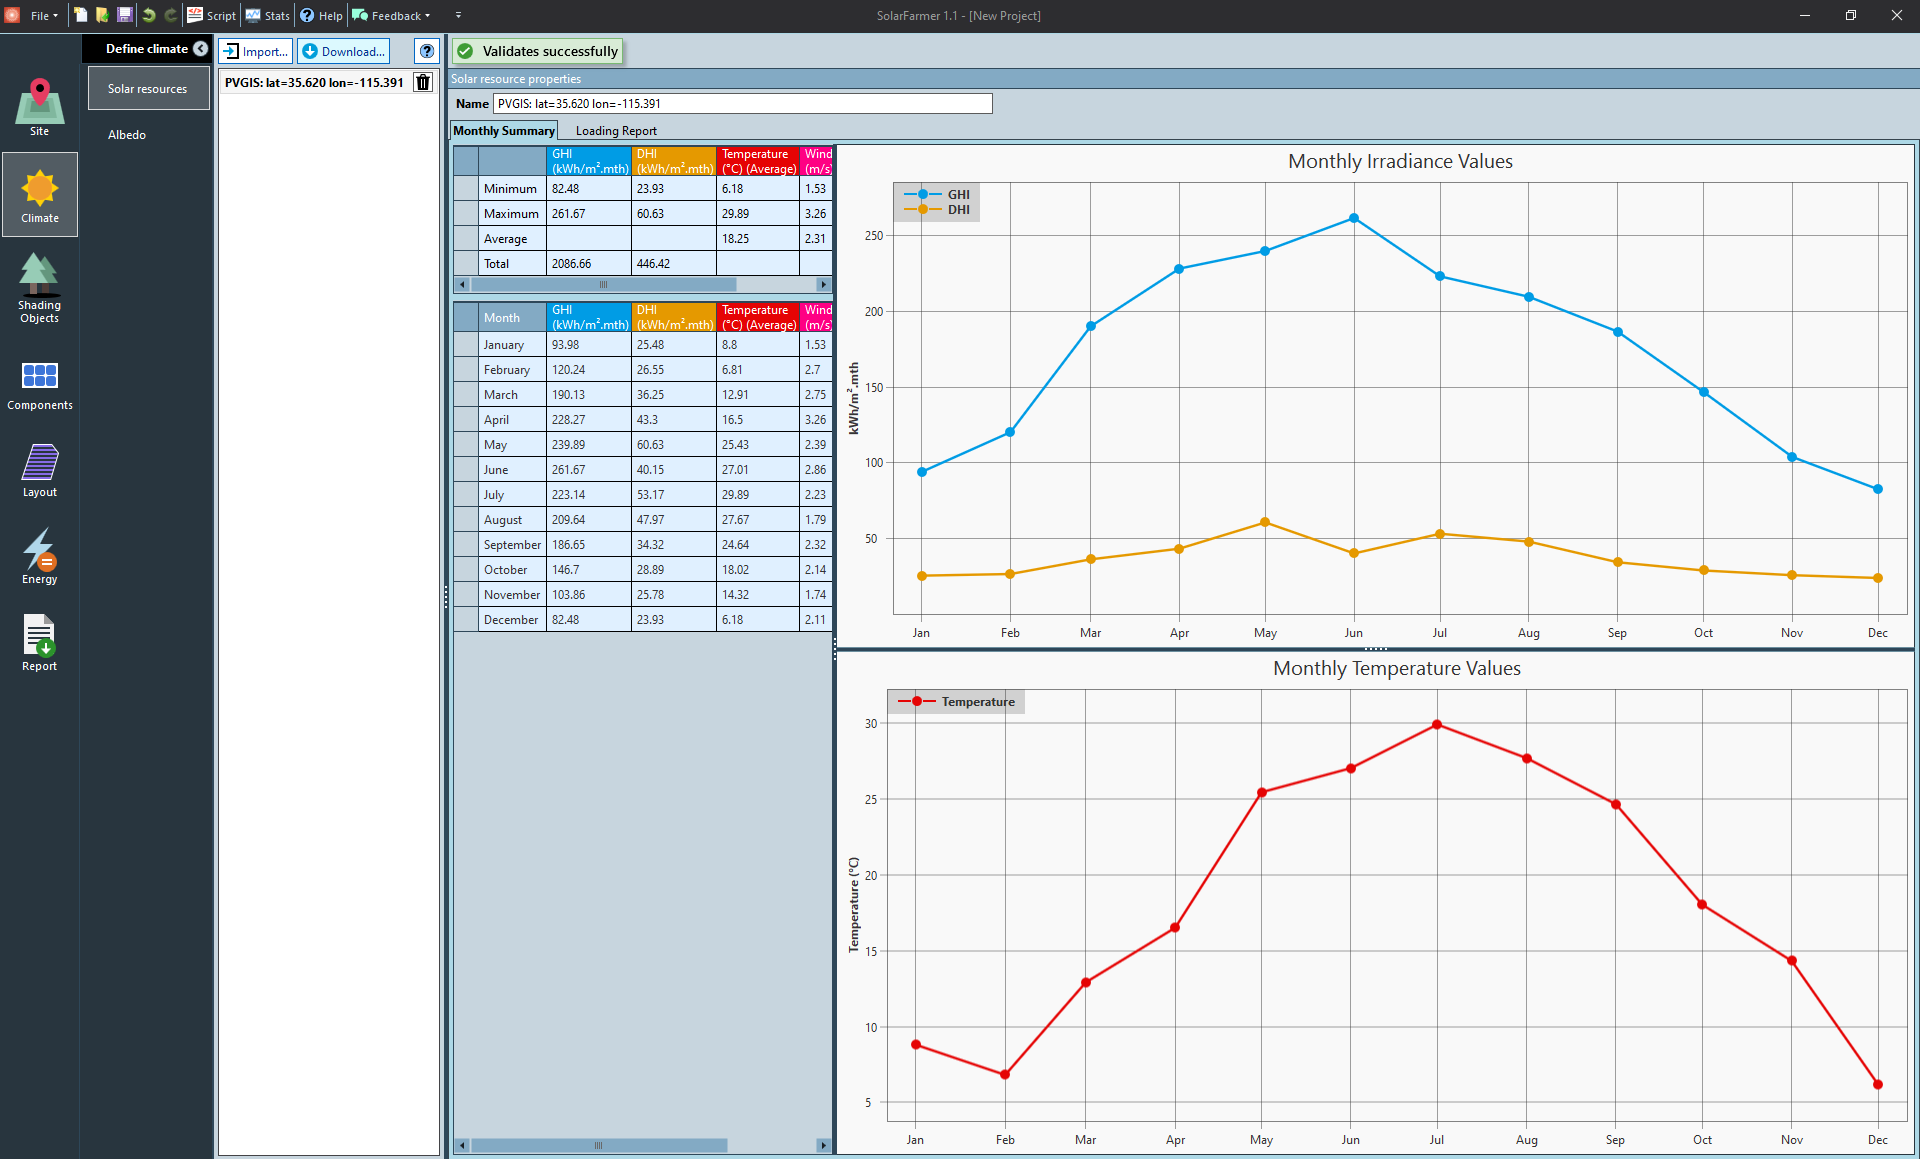
Define solar resource
Go to the Solar resource page.
For this project we will Download free solar resource data from PVGIS.
- Click the Download… button, select "PVGIS TMY (from online API)" and
then click the
 button.
- Click the Download… button, select "PVGIS TMY (from online API)" and
then click the
You can view any warnings in the Loading report tab and the monthly statistics in the Monthly summary tab (see screenshot below).
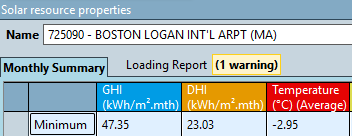
The warning shown in the example above is for illustration purposes only
Define albedo
We will set the Annual Albedo Value as 0.2 for this exercise.
Note
More information can be found in the Albedo page.
Links to relevant sections of the user guide are indicated by the  symbol in the user interface.
 Define shading obstacles
This project is far enough from buildings to ignore near shading objects. Continue straight to the next chapter.
 Define components
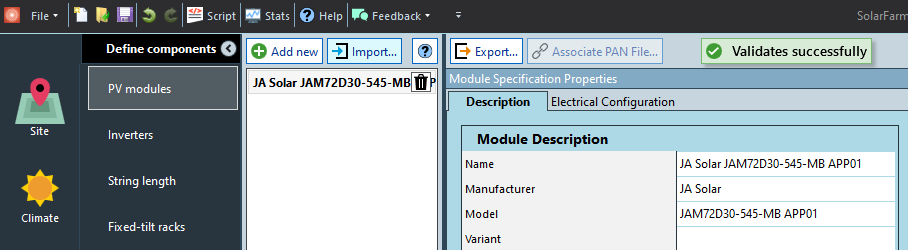
PV Modules
Click the Import button and select PV module PAN file "PAN/JASolar_JAM72D30-545-MB_APP.PAN" from the
data folder that you downloaded at the start of this tutorial. You'll now see the PV module properties.
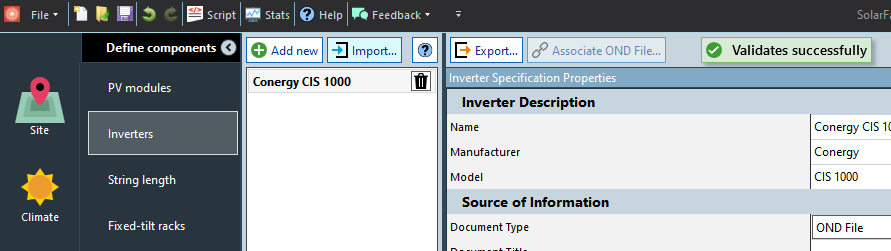
Inverters
Click the Import button and select the Inverter OND file "OND/Conergy_CIS_1000_ANmod.OND".
In the inverter properties at the bottom right you will notice that this inverter has 4 inputs. Each inverter can connect to 1 string of PV modules.
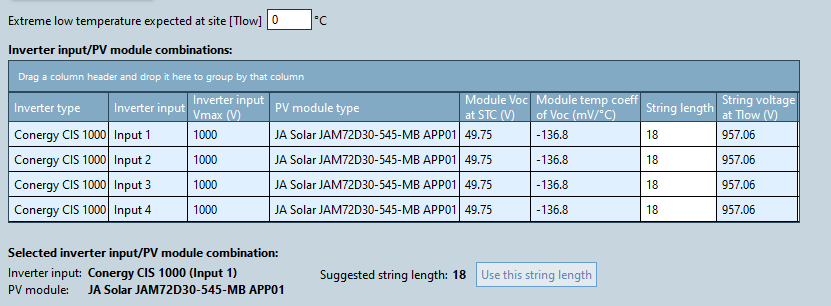
String Length
Leave the Extreme low temperature set at 0°C.
Ensure 18 is entered for the String length (modules per string) at each inverter input in the table. (See screenshot below).
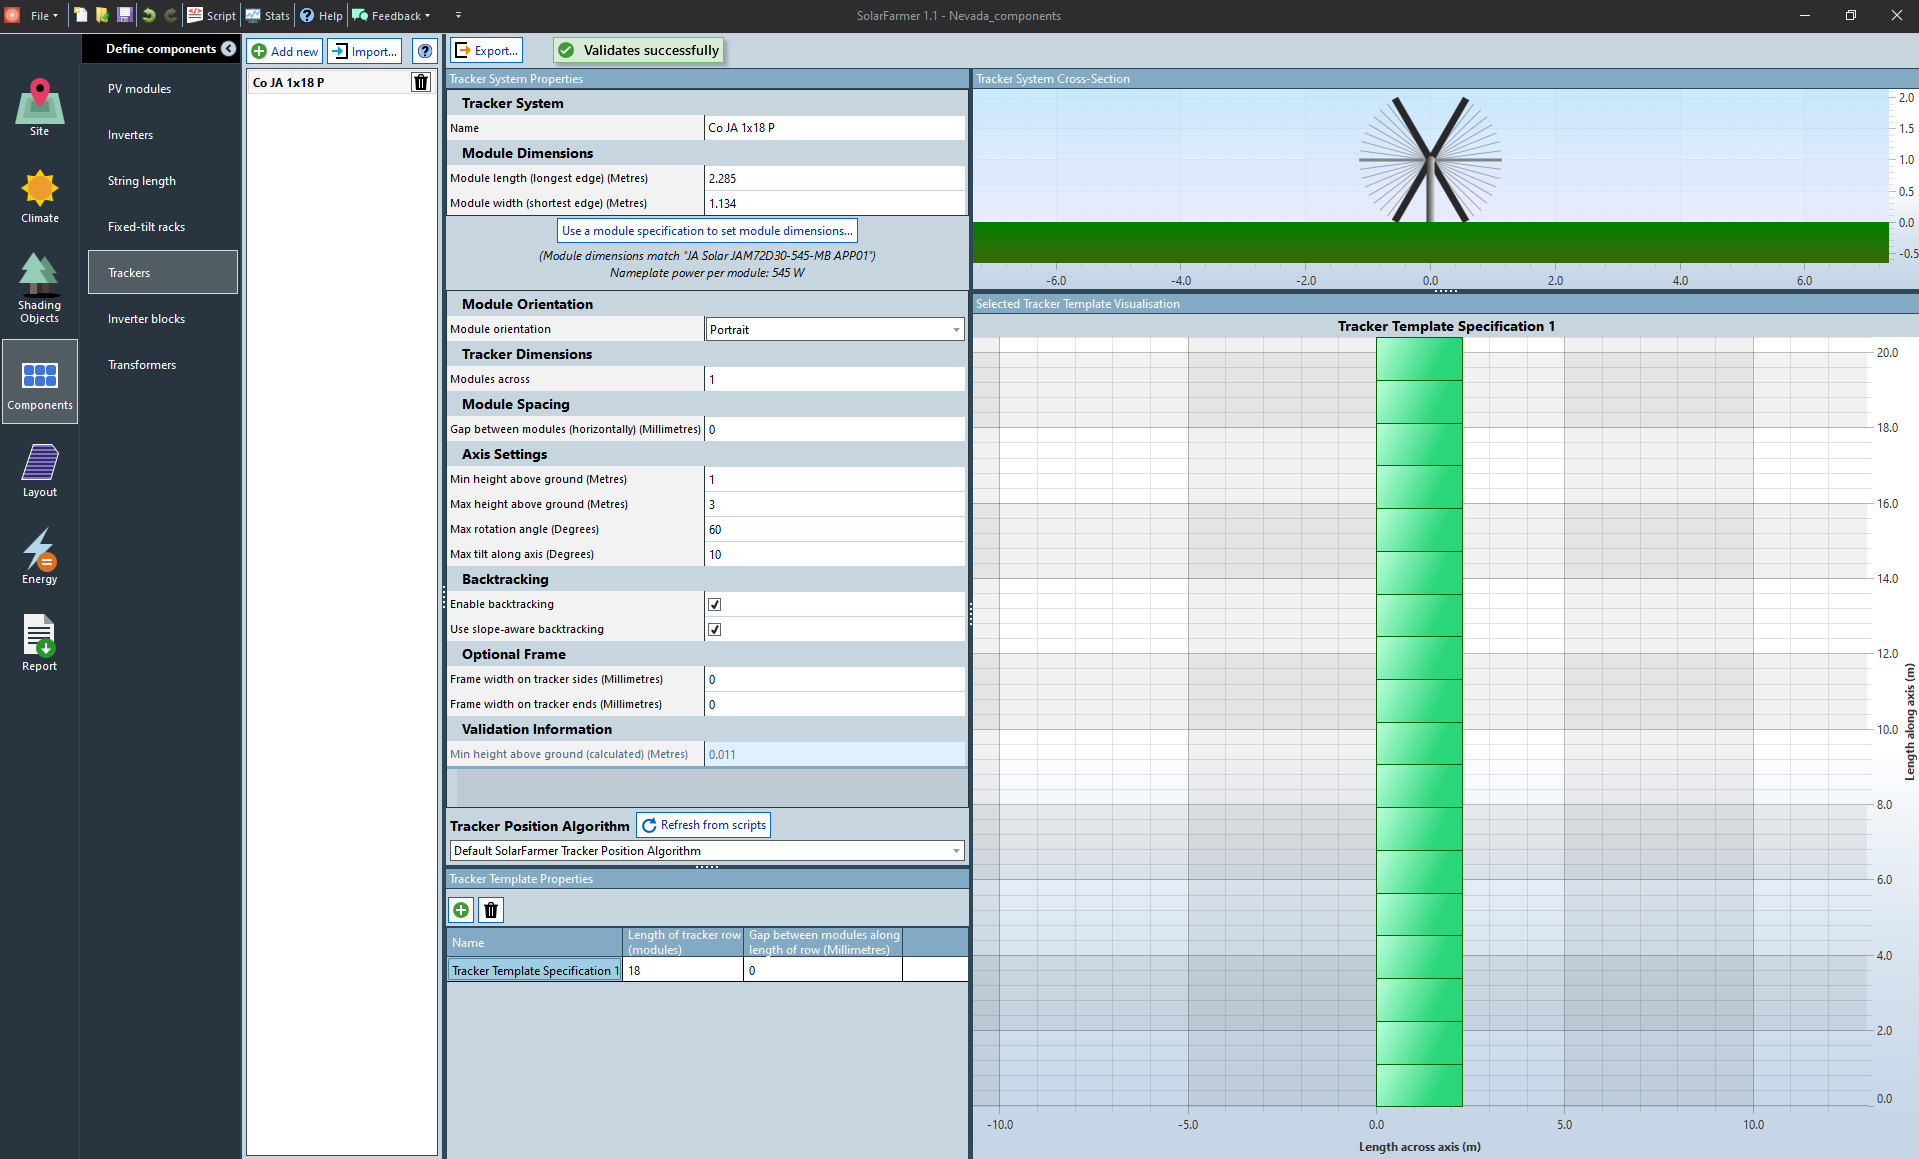
Define Trackers
Skip the Fixed-tilt racks task and go directly to Trackers. Click the Add new
 button to create a new Tracker.
Rename the tracker system to
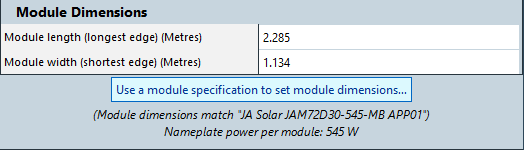
Co JA 1x18 PModule dimensions should be automatically match the imported JA Solar PV module, (if not click Use module specification… button)
In the Tracker Template Properties section, add a new template (green plus icon).
Set the Length of tracker row to 18 modules set to match the string size.

Note
Setting the tracker size to match the string length ensures that you will be able to string all of the modules in the system to inverters.
Inverter Blocks
Skip the inverter blocks page for this tutorial. These are used to save time in very large layouts by repeating a common pattern.
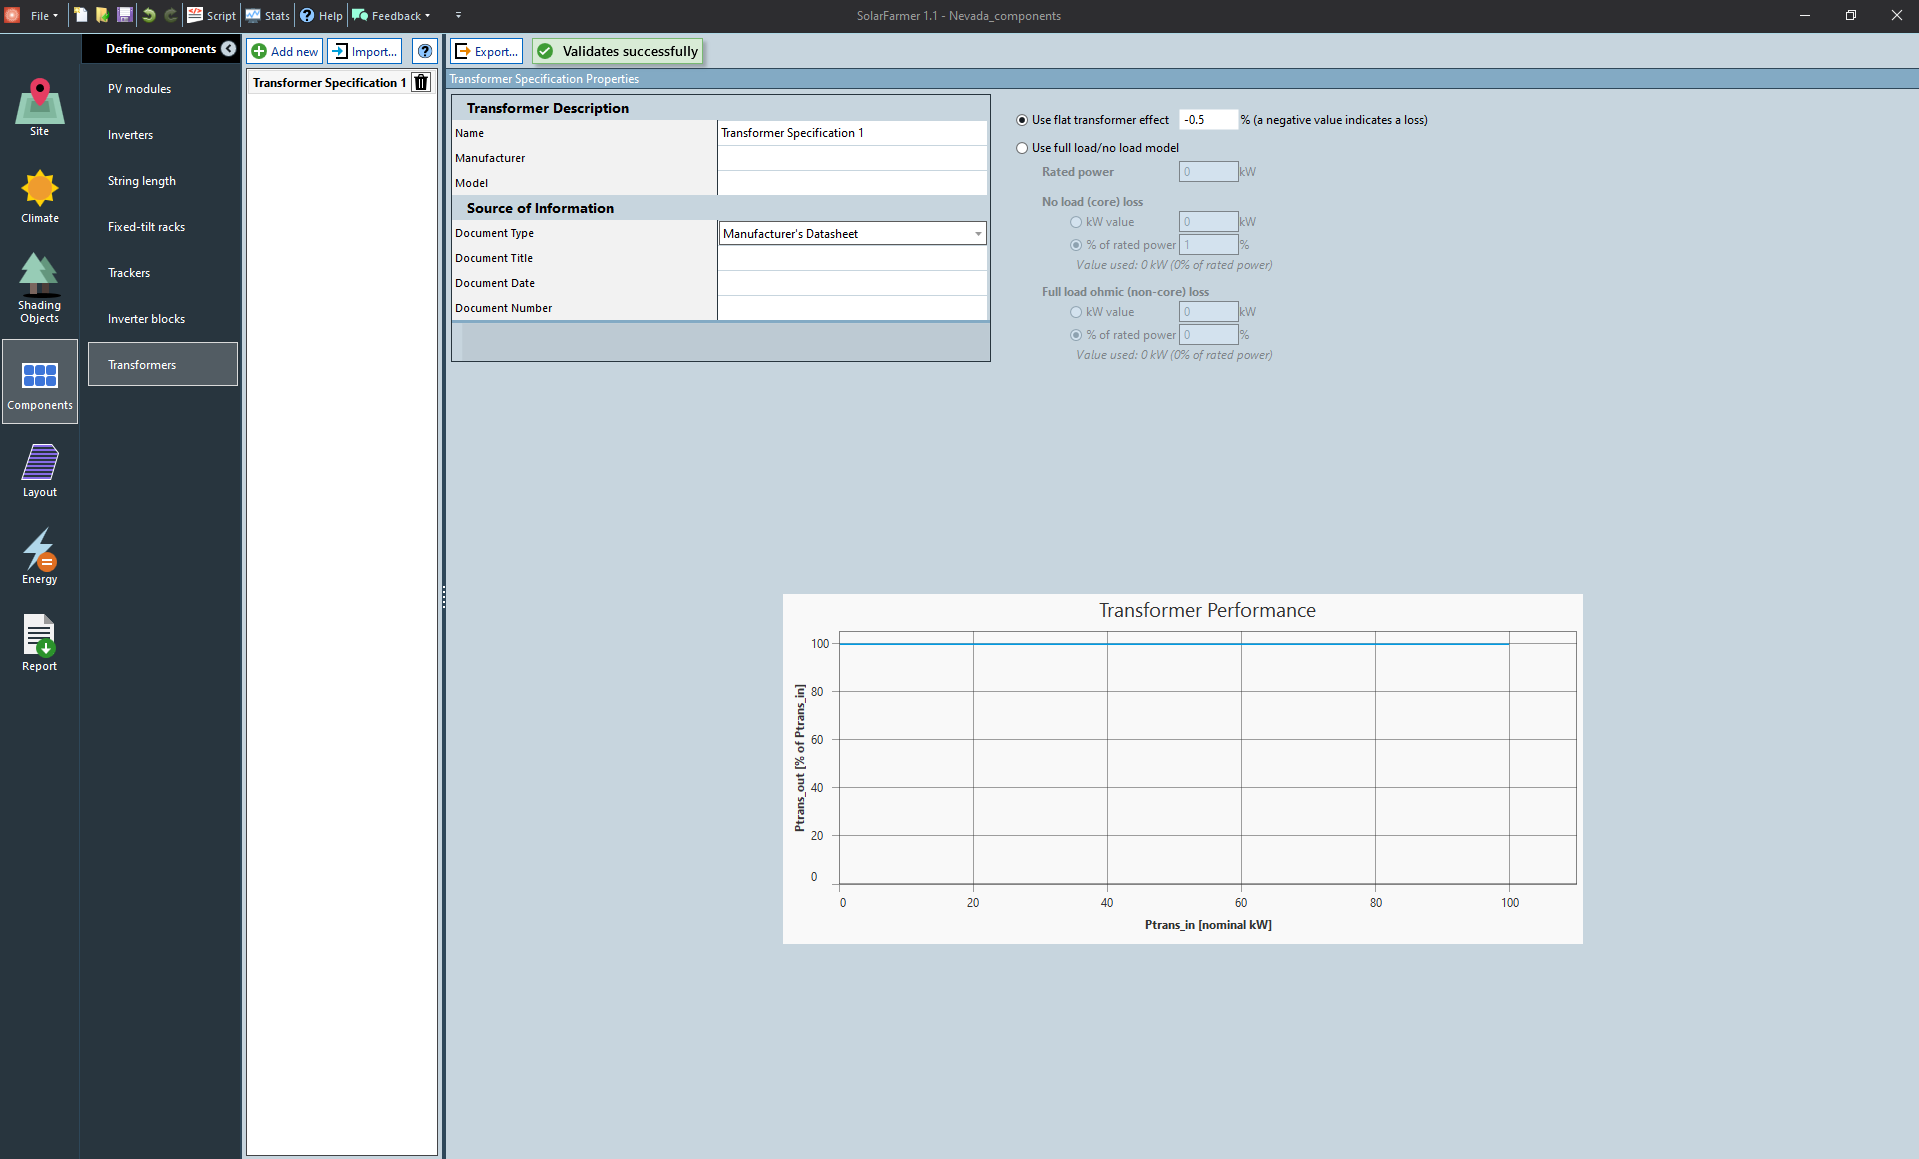
Transformers
Click the Add new
button to
create a new Transformer.Set a flat transformer effect for a constant loss as -0.5%
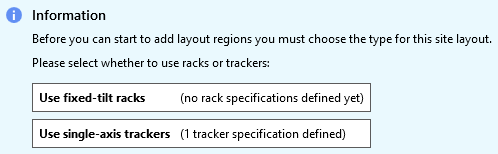
 Layout
Select the option Use single-axis trackers to start
Place a Transformer anywhere on the map using the Add Transformer
 button on the toolbar.
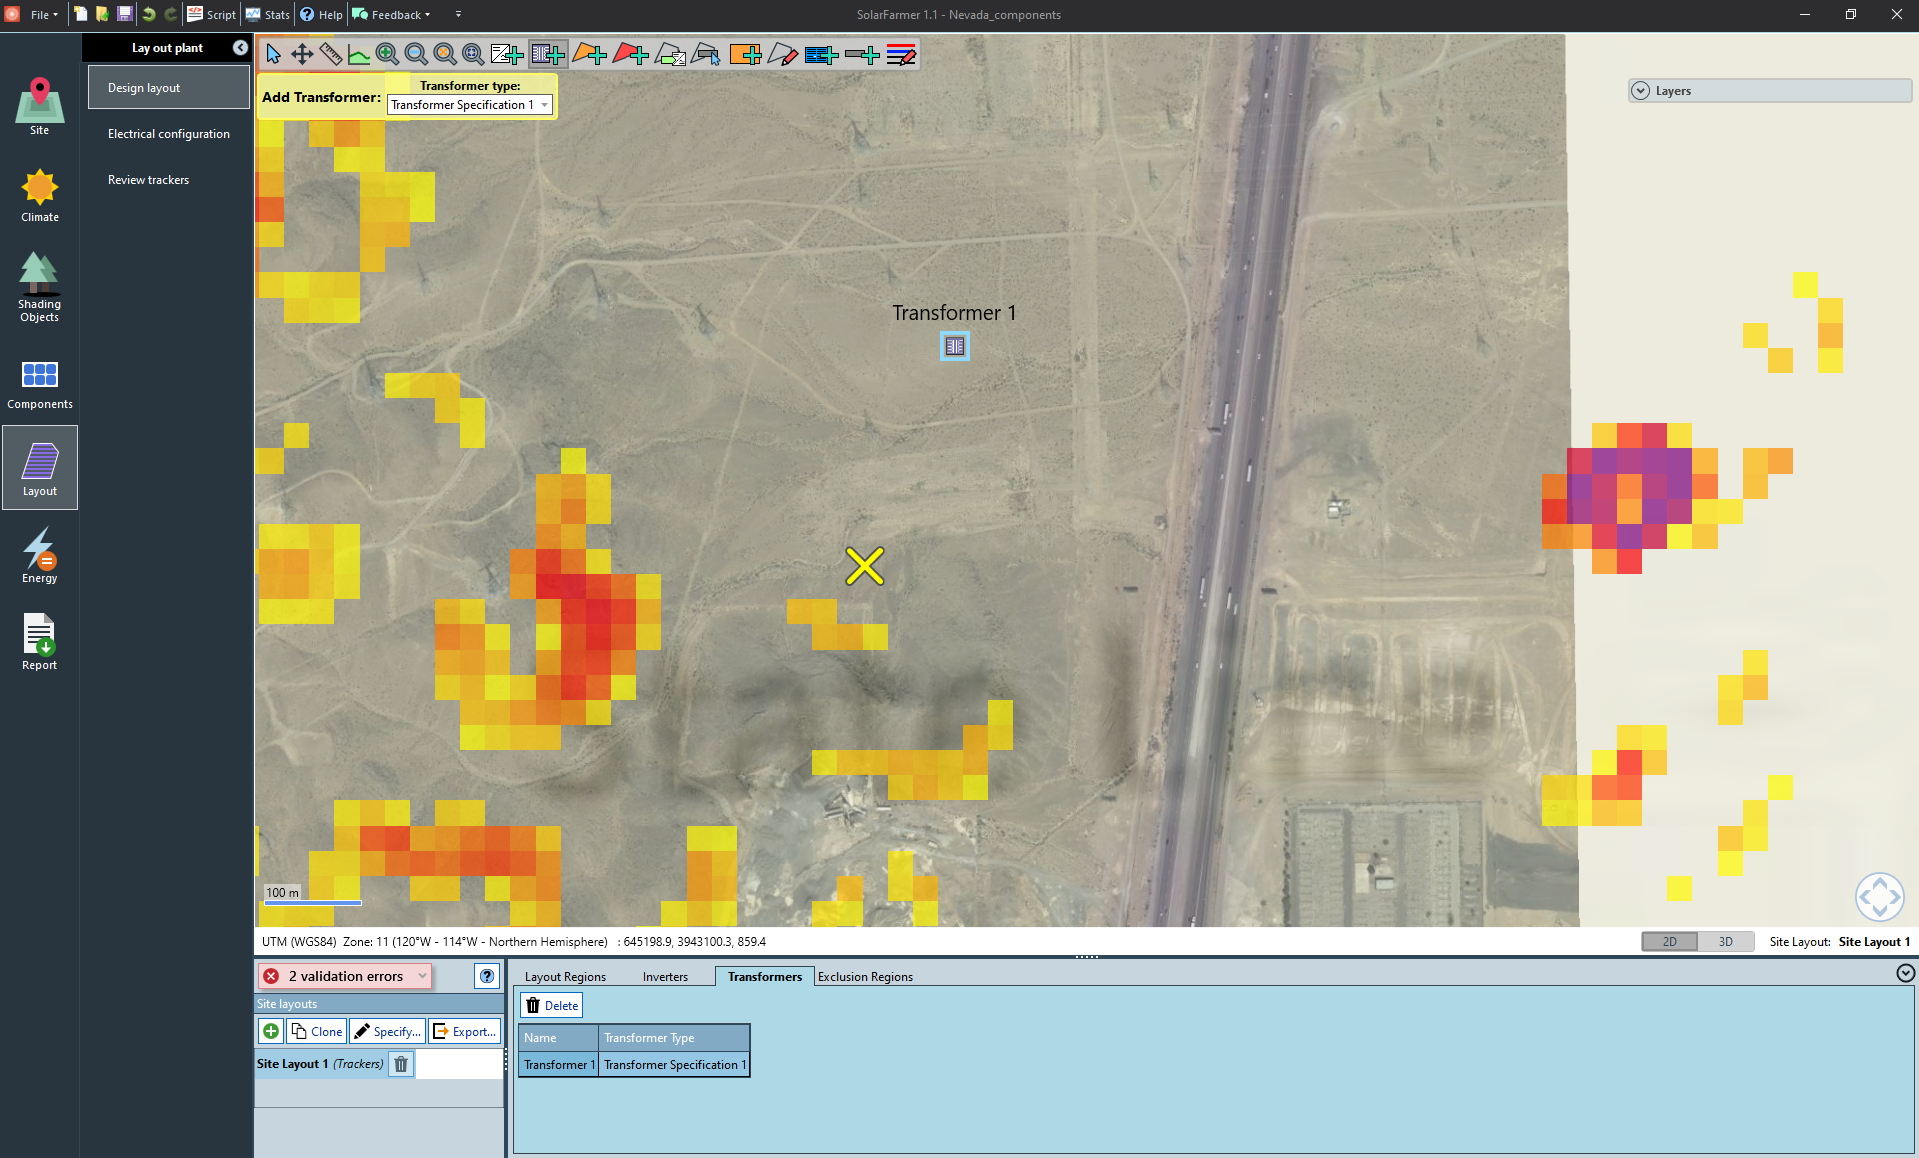
Note
Any Inverters that are then introduced to the layout will automatically be connected to this transformer.
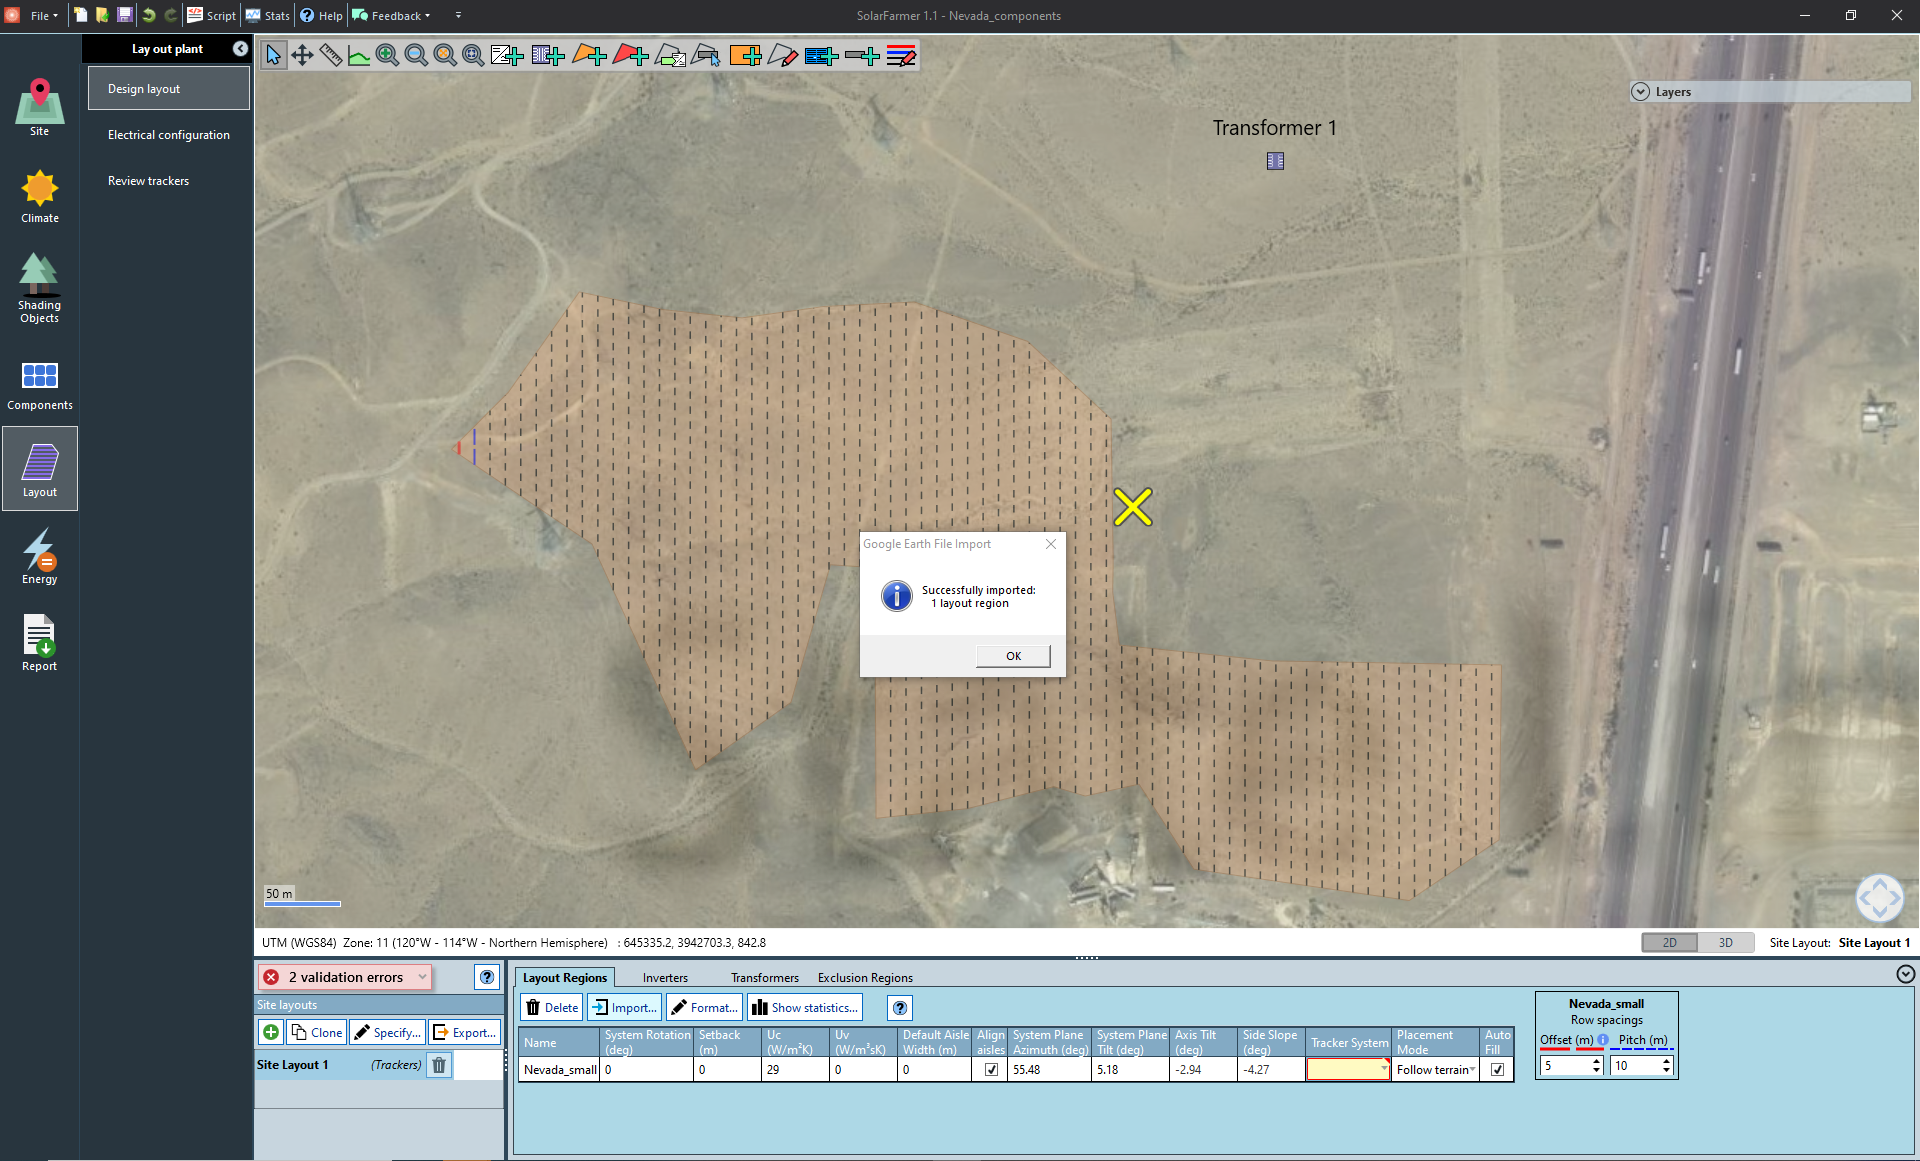
Ensure the Layout Regions tab is selected, click the Import button and choose the Google Earth KMZ
"Boundary/Nevada_small.kmz"from the file that you downloaded at the start of this tutorial.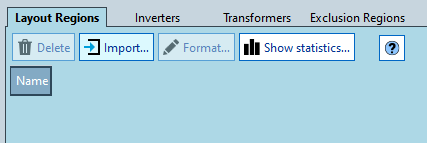
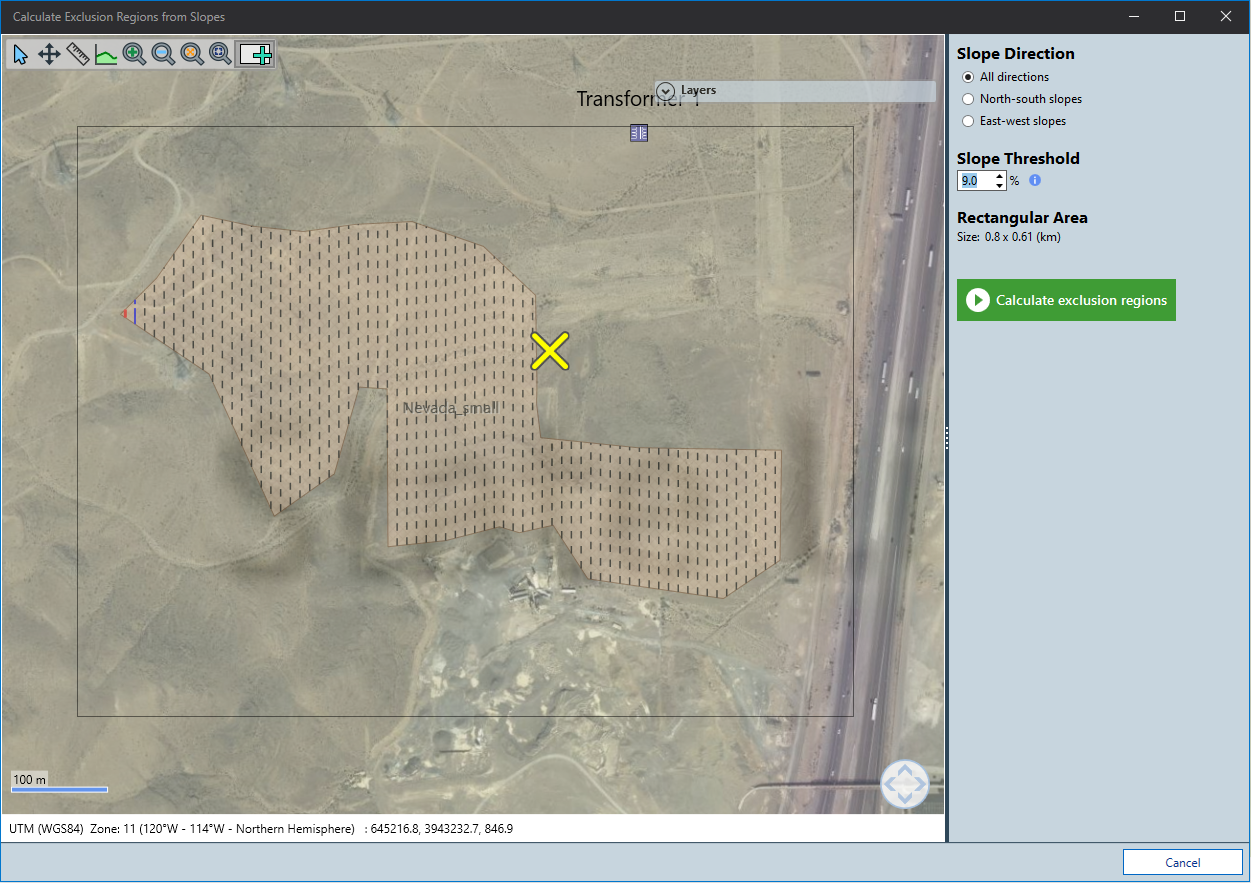
Ensure the Exclusion Regions tab is selected and click the Calculate exclusions from slopes… button.
Click the Selection Rectangle
 and draw a rectangle covering the entire
layout region. Lets use an all directional slope threshold of 9.0% to automatically calculate exclusion regions
where we do not want trackers to be built. Click
and draw a rectangle covering the entire
layout region. Lets use an all directional slope threshold of 9.0% to automatically calculate exclusion regions
where we do not want trackers to be built. Click  and then
  .
.
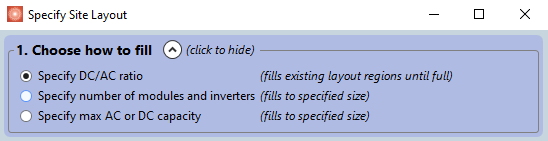
Specify site tool
When prospecting a site you may have some idea of constraints or design parameters that you must work towards, but it is likely that within the constraints there are design options that can be explored. The specify site tool allows you to set constraints and quickly generate layout variations that they can be compared. The Specify Site Layout Tool page explains the various different ways to use this feature in detail.
For this tutorial we will assume that our design constraint is to meet a DC/AC ratio of 1.2 within the specified layout region.
Start by clicking the
 button.
First you must choose how to fill. Lets select the specify DC/AC ratio option.
Next we must Specify layout definitions. Layout definitions are used to define parameters for creating new layout regions, or filling existing layout regions with new racks or trackers. Expand this section by clicking the
 .
.We can leave most of the settings with the default values (you may need to scroll to the right or expand the window to see them all). Let us set the Pitch to be 14m and ensure that the
Co JA 1x18 PTracker System that we previously defined is selected.
Next we will set up a sub-array. You will see that one sub array already exists, and since we only have PV module and one inverter loaded in our workbook, these options appear in the drop downs by default. You will also see that our previously chosen string length appears here, but you have the option to can override this.
Now lets set the DC/AC ratio to 1.2 for 100% of the site. You will notice that the 'strings per inverter input' and the 'total' values update.
Lets choose to fill all layout regions and create new trackers. The tracker layout definition that we previously defined should be selected by default.

We can now apply these choices by clicking
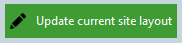 .
SolarFarmer now draws the layout and it should look like the image below. The layout is
saved within the workbook and can be renamed if you wish.
.
SolarFarmer now draws the layout and it should look like the image below. The layout is
saved within the workbook and can be renamed if you wish.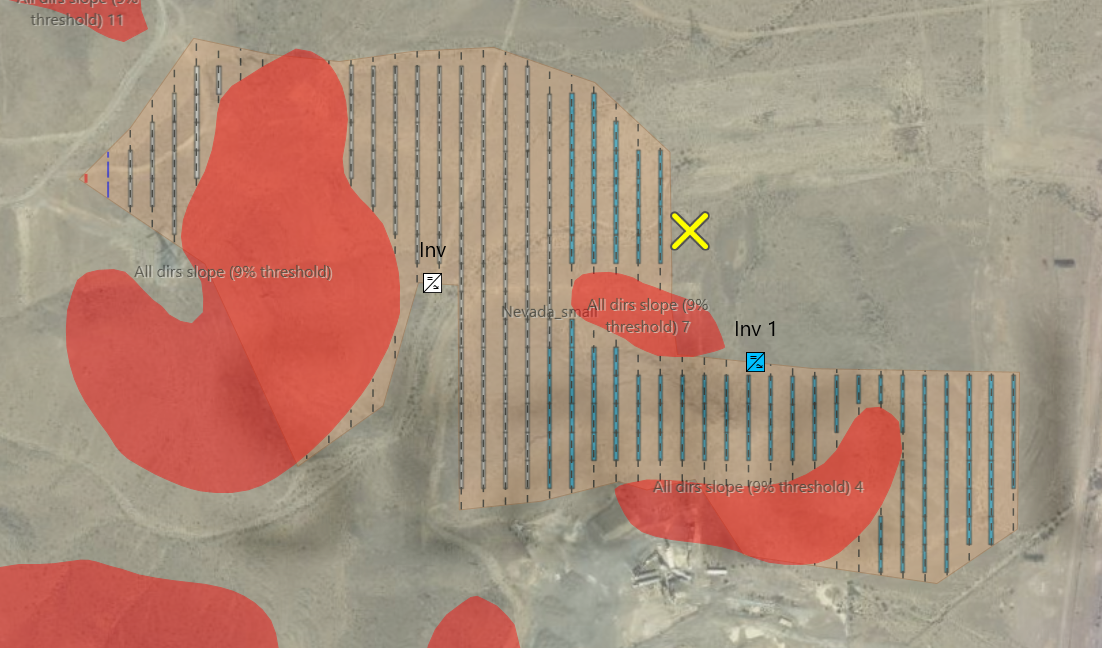
Note
You may wish to turn off the slope magnitude layer in order to get a cleaner view of the layout.
 Energy
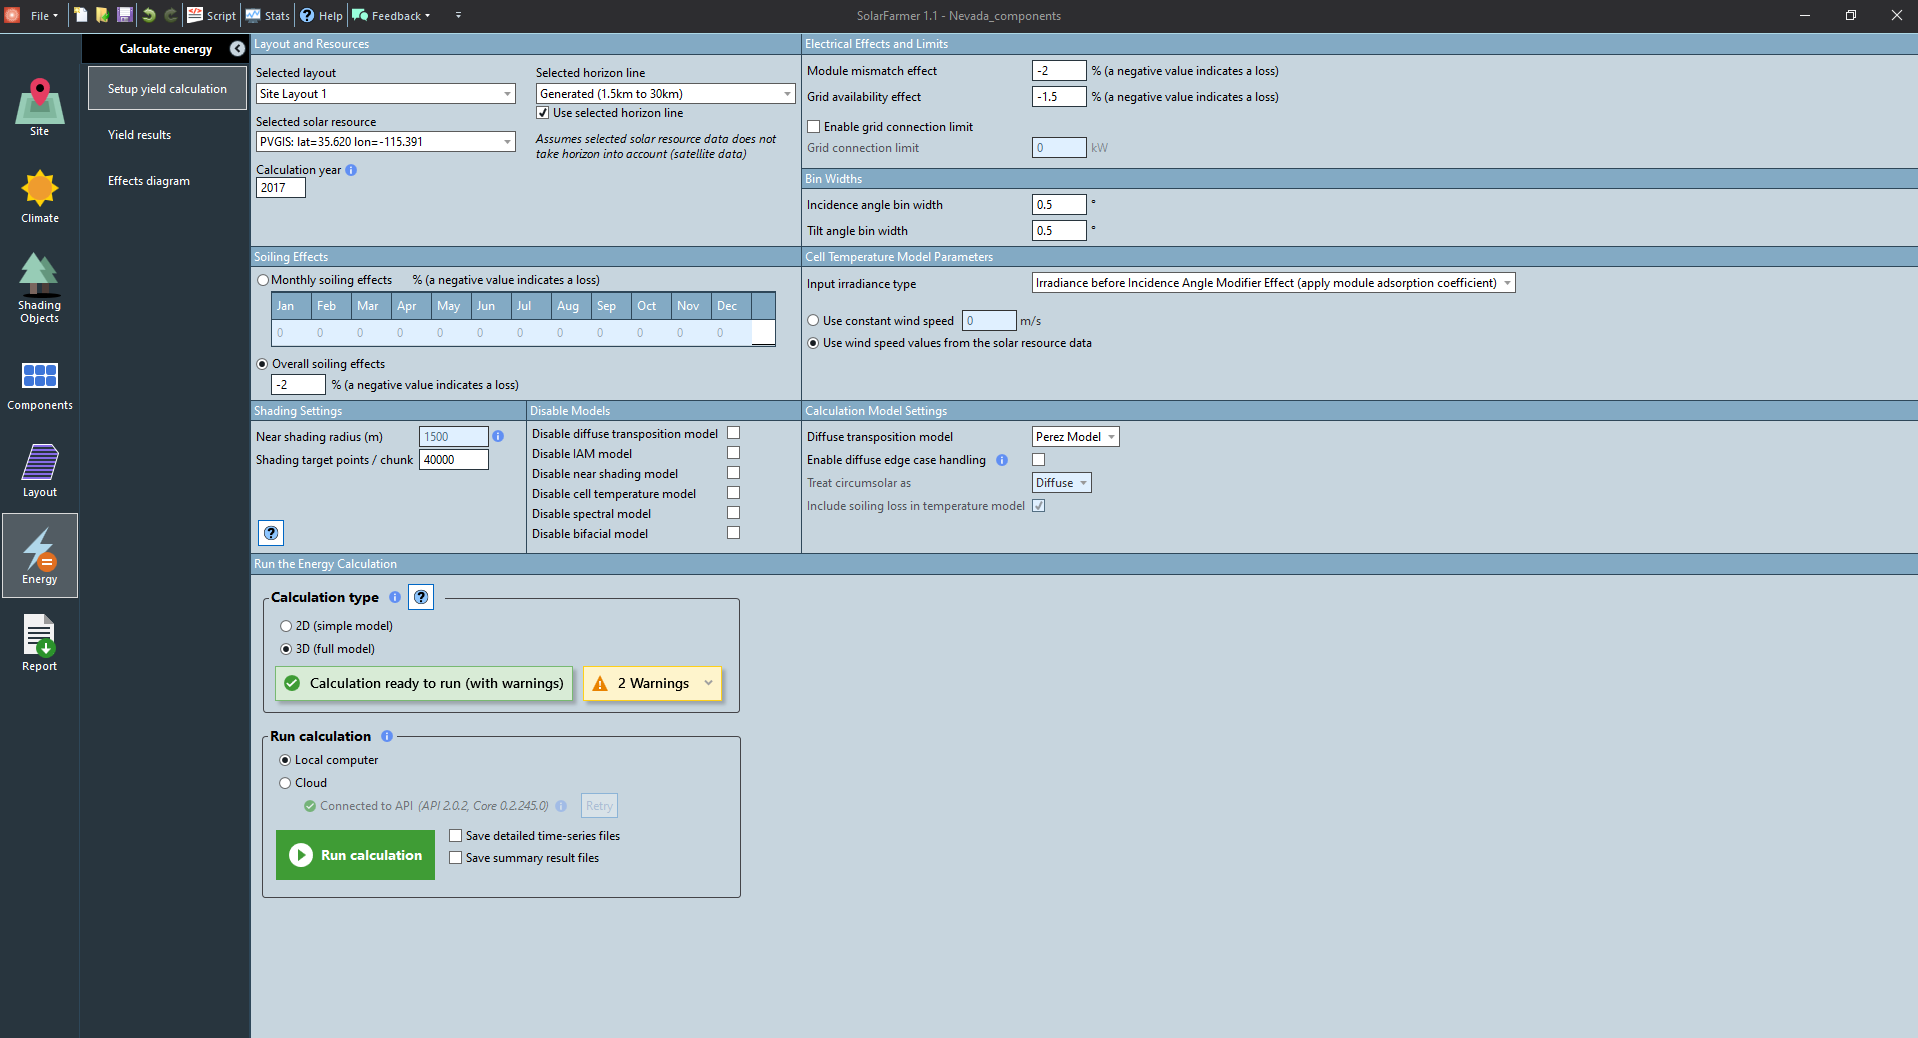
Setup yield calculation
Set the Module mismatch effect to -2.0% (see image below)
Set the Grid availability to -1.5% (see image below)
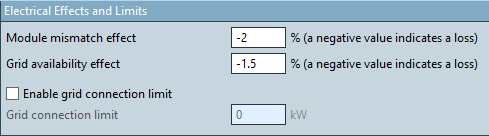
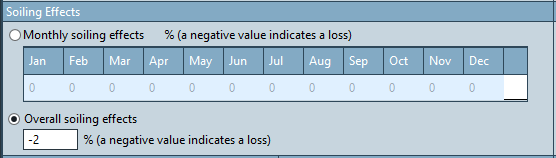
Set an overall soiling effect to -2.0% (see image below)
Save the workbook by clicking File > Save as and give it a name, e.g.,
"Nevada".Note
You need to save the workbook before running a simulation.
Select 3D (full model) for the Calculation type option
Select Local computer for the Run calculation option.
To speed up calculation time, uncheck the boxes Save detailed time-series files and Save summary result files.
Click the Run calculation button to start running the calculation. Go and make a cup of tea, the locally run 3D calculation should take roughly 10 minutes depending on the machine you are using! For faster calculation times, email support to get access to the 3D cloud compute.
Note
You will see some warnings. You need to expand the warnings panel and hover over each one to read the description.
Warnings point out possible areas that need checking but do not stop you running a calculation. In this example you can ignore the warning.

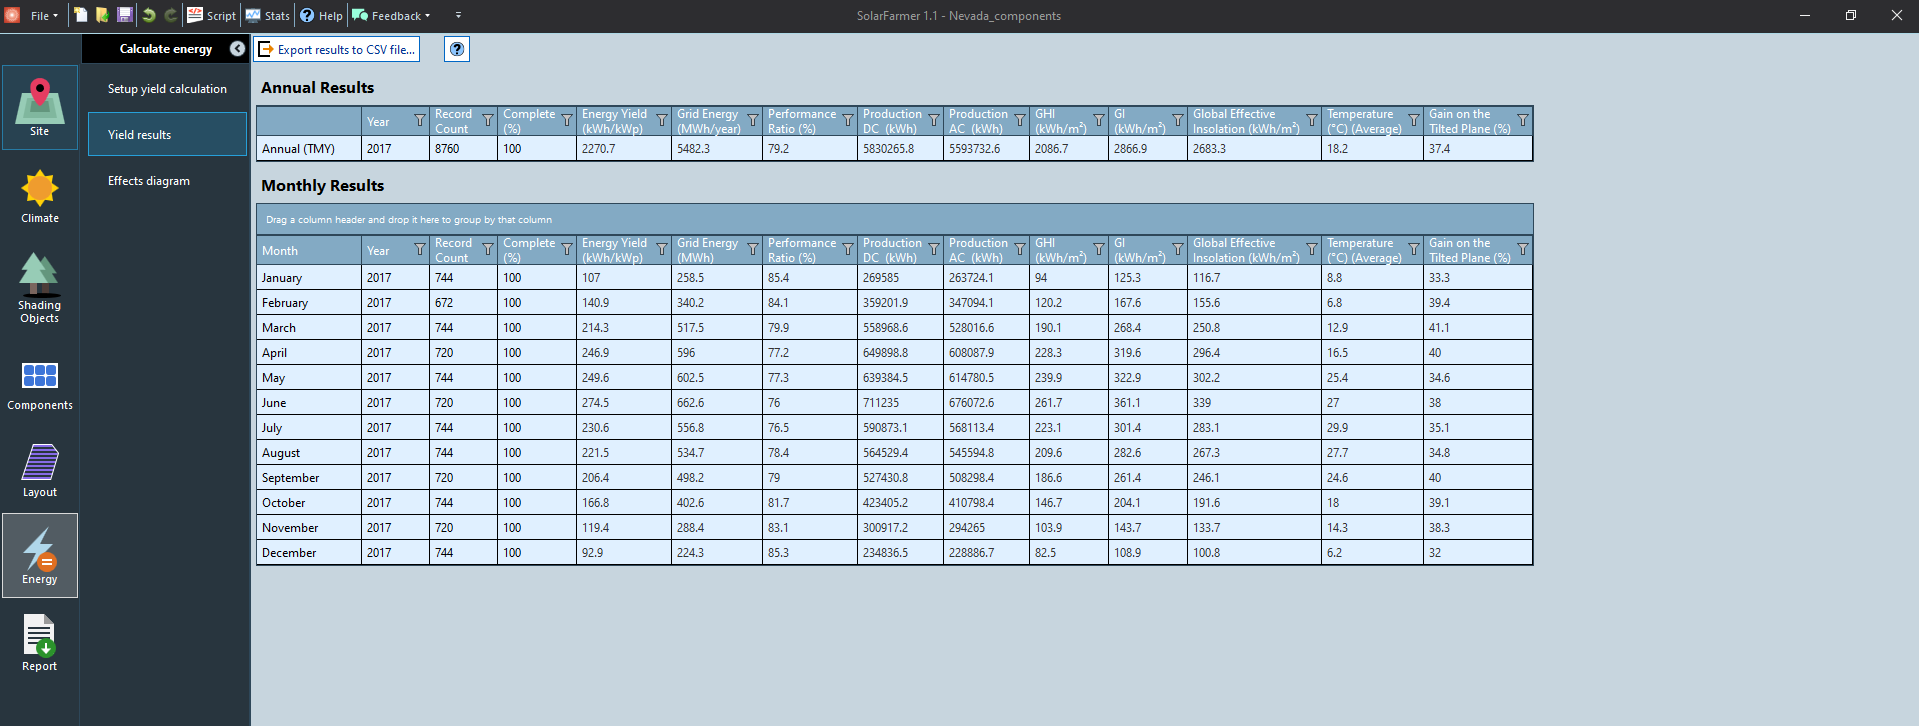
View Yield summary
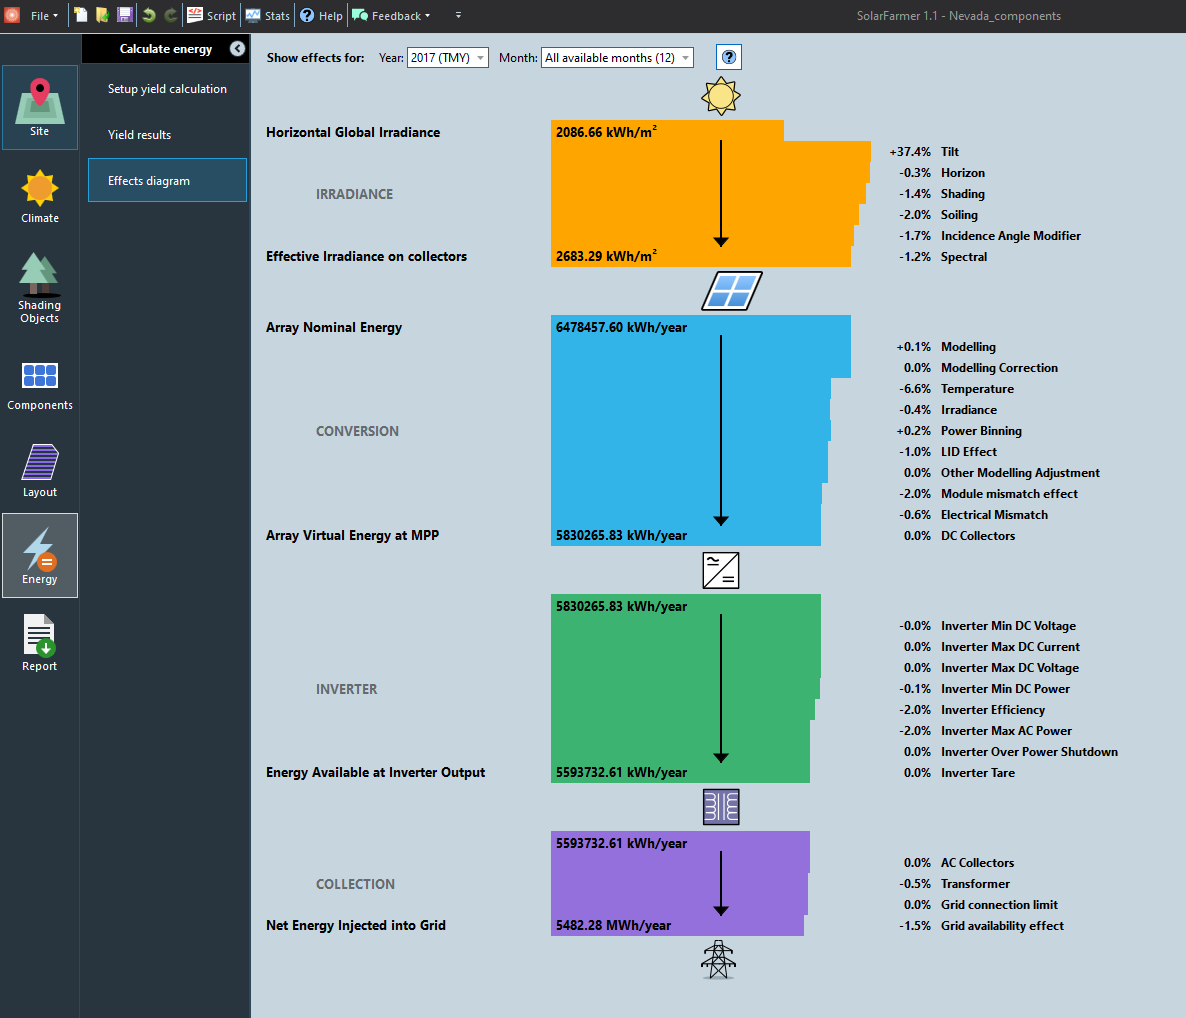
View Effects diagram (loss tree)
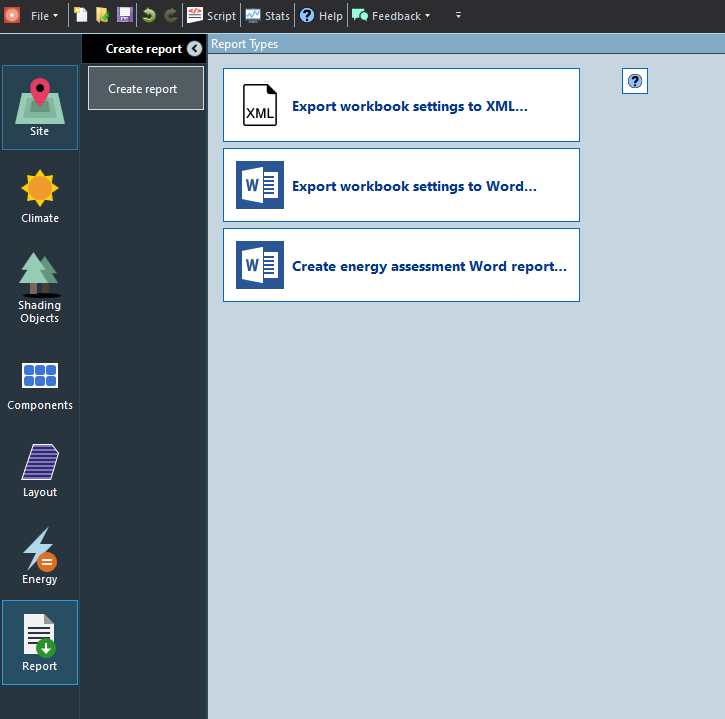
Generating a report
In the Report chapter, click the 'Create Energy Assessment Report...' button.
This creates a Word document (using a built-in template) of all the workbook settings and the energy yield calculation results (tables and effects diagram).
You have now completed the Nevada prospecting tutorial for a single layout.
Note
You may now wish to create new layout variations in order to improve the performance of your design.
In the Design layout task you can Clone the existing layout and then re-run the Specify Site Layout tool with different parameters to create new designs.
Assess the performance of your new designs by selecting the new layouts in the Setup yield calculation task, running the energy calculation and comparing the results. Our facilitator lead training courses cover this process more fully, including how it can be automated using scripts.

End of the tutorial.