Map Backgrounds and Terrain
This task allows you to import and download background imagery and terrain to your site. You can also define building regions to create buildings to place racks on.
Map Backgrounds
 |
Import a georeferenced image | For importing image files that contain georeferenced meta-data (i.e. they have a location and area). They will be placed in the correct location on the map |
 |
Import and rectify any image | For importing image files that do not contain any georeferenced information (i.e. a simple *.jpg or *.png file). The rectification tool appears to allow you to position the image on the map (see below). |
 |
Download imagery | Download imagery from Bing Maps online sources (aerial and roads). |
Rectification Tool
This tool allows you use a non-georeferenced image as a background image on the map. This is useful if you receive an image or PDF of the site layout that doesn't have any geographic reference. You can then use this rectified site layout image to help you lay out an existing site layout.
The idea is to add control points to the source image and add corresponding control points on the map (which will have a geographic position) using the downloaded background imagery as a reference. The software then warps (rectifies) the bitmap image by lining up the corresponding control points and stores the warped image as a background image.
To use it:
- Open a source bitmap image. This appears on the top-left of the tool window.
- Pan and zoom the workbook map (on the top-right of the tool window) to roughly show the same area covered by the source bitmap.
- Right-click on the source image to add a control point. A corresponding control point appears in the workbook map.
- Select and drag the corresponding point in the workbook map to the correct geographic location.
- Add at least 3 controls points to help get the rectification correct.
- Click the 'Rectify' button.
The image will be rectified and added as a background image to the map.
Terrain
You can import terrain files if you already have them, or download free terrain files for the area of your site.
Building regions (see Building regions below) also act as terrain, allowing you to add layout regions on top of them.
|
Import a terrain file | If you have been provided with a specific elevation file for your site you can import it here. |
|
Download terrain | This shows the download wizard where you can download free SRTM (Shuttle Radar Topography Mission) terrain for the selected area. This is generally lower resolution than bought terrain files for your area, but often sufficient. |
SolarFarmer supports terrain data in the following file formats:
| File type | Accepted file extensions |
|---|---|
| Common elevation formats | *.dtm; *.grd; *.xyz; *.tif; *.shp; *.map; *.hgt; *.zip |
| DTM files | *.dtm |
| Surfer grid files | *.grd |
| XYZ files | *.xyz |
| Vector format files | *.000; *.DWG; *.MP; *.NTF; *.asc; *.bln; *.cdo; *.csv; *.dat; *.dgn; *.dxf; *.e00; *.e57; *.gm?; *.gpx; *.gtm; *.gz; *.kml; *.kmz; *.las; *.laz; *.ldb; *.mif; *.opt; *.ovr; *.plt; *.rte; *.shp; *.tab; *.tgz; *.trk; *.txt; *.usr; *.wpt; *.xyz; *.zip; catd.ddt; arc.adf; dht; lab.adf; lht |
| Elevation files | *.1; *.2; *.NFT; *.agr; *.asc; *.bil; *.bip; *.bln; *.bsq; *.bt; *.csv; *.dat; *.dem; *.dt?; *.dte; *.e00; *.e57; *.ers; *.flt; *.gm?; *.grd; *.gsd; *.gxf; *.gz; *.hdf; *.hgt; *.img; *.las; *.laz; *.ldb; *.ter; *.tgz; *.tif; *.txt; *.xyz; *.zip; *_fp; catd.ddt; demfloat; w001001.adf |
Downloading terrain from within SolarFarmer
There are two terrain download options:
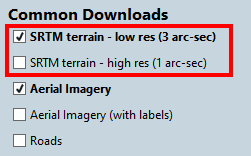
- SRTM terrain - low res (3 arc-sec). This is the default and is usually sufficient for most people.
- SRTM terrain - high res (1 arc-sec). This is higher resolution terrain (if available for the area of your site).
The file sizes are much bigger and can make your workbook file size very large, so only use this option if you really need the higher resolution.
Note
The server used to retrieve the terrain has variable speed and reliability, so please have patience.
Manually downloading terrain
You can choose to manually download terrain files from the USGS servers (that the SRTM terrain files are stored on). This way you could create your own repository of terrain files to use in different workbooks, which may be quicker and easier to import into SolarFarmer than downloading them for each workbook.
To manually download your own terrain files:
- Go to https://earthexplorer.usgs.gov and log in (create a free account if you don't already have one (required to download files))
- Locate your site using the map or co-ordinates
- In the Search Criteria Tab select Circle and put a radius of 30km (recommended if you want SolarFarmer to generate the horizon file, else can choose a polygon or circle at a radius of your choice) and press apply, you should then be able to see it on the map.
- Go to 'Data Sets' tab and select:
- 'Digital Elevation' -> 'SRTM' -> 'SRTM Void Filled' for the lower resolution 3 arc-sec data.
- 'Digital Elevation' -> 'SRTM' -> 'SRTM 1 Arc-Second Global' for the higher resolution 1 arc-sec data.
- Go to 'Results' and for each tile presented, use 'Download Options', you can use the BIL, DTED or GeoTIFF formats, but BIL is recommended for size of file.
- Once the zip files are downloaded, import them into SolarFarmer using the Import Terrain File button above in the Setup Site Chapter, and the Map background/terrain task. You do not need to extract the archives, you can just select the ZIP files all at once. You may get a message saying "The data and workbook projections are different. Would you like to reproject the data or cancel?" Select OK, this prompt will come up for each file being imported.
Please note that this does download a large amount of terrain and can make the workbook quite large, once you have generated a horizon file you can choose to delete tile co-ordinates you no longer need.
Building regions
Building regions are a way to add flat-topped buildings to your site.
Define a boundary representing the building, give it a height, and it will be treated as terrain.
You can then add one or more layout regions on top and any racks added will be placed on the building.
Any shading objects added within the bounds of the building region will also be placed on the building,
allowing you to add shading objects to represent air-conditioning units, chimneys and other features.
Add a new building region
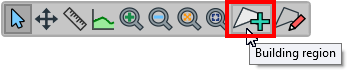
Go to the 'Site > Map backgrounds/terrain' task.
Click on the 'Building region' button in the map toolbar (light grey polygon with '+' symbol highlighted in red below.
Click on the map to add points to form a polygon representing the building.
Finish the polygon by clicking on the first point you clicked, or double-click on the last point.
A new building region object is added to the map, and also to the table in the 'Building Regions' table in the bottom-left panel:
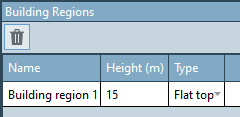
Set the height of the build region (height in metres above the terrain).
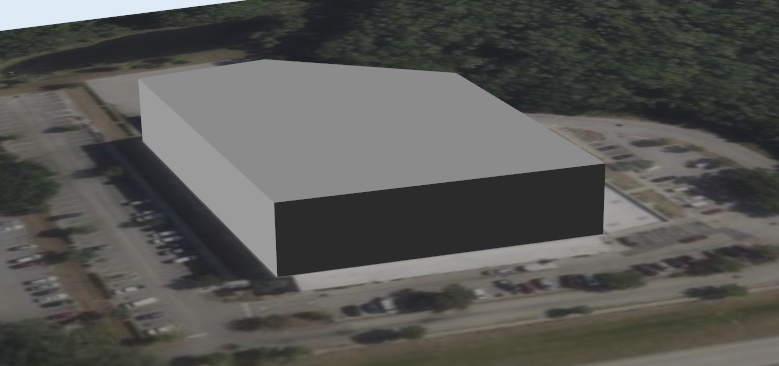
Leave the type as 'Flat top' - which means that the 3D volume will have a horizontal top face.
Pitched roof buildings are coming in a future release.Switch the map to 3D mode to see the 3D building volume.
Add a layout region on the building
Now you have a building you can add a layout region on top of it, in which to place racks.
Go to the 'Layout > Design layout' task.
You can either add a polygonal layout region on top of the building as you would normally, or select the building region on the map, a 'Create from Building Region' button appears in the 'Layout Regions' tab in the bottom panel:
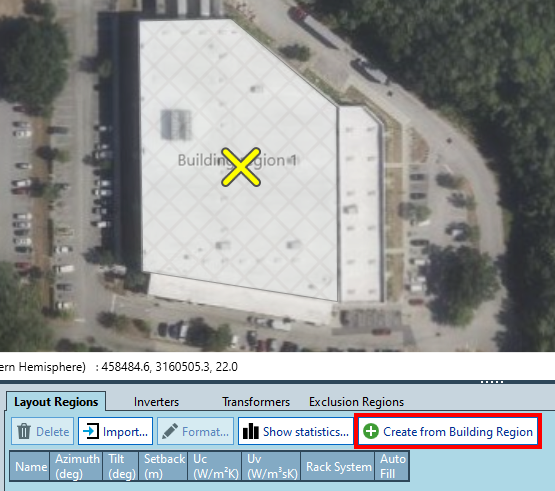
Clicking the 'Create from Building Region' button creates a layout region that fits exactly on top of the building (saving you some fiddly clicking!). It has an automatic setback of 1.5m (which you can change).
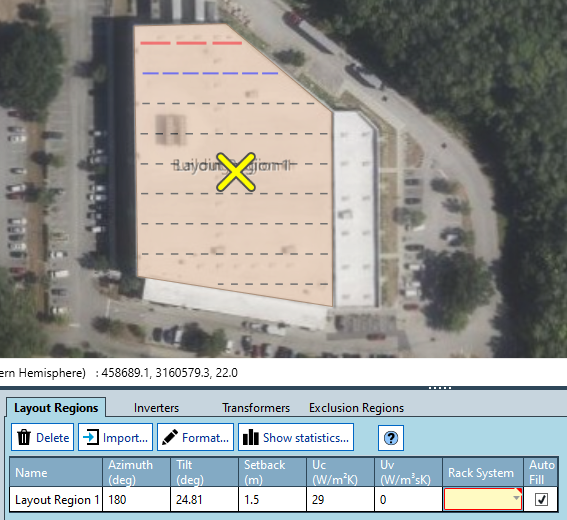
Choose a Rack System to add racks.
Make sure to update the 'Height of lowest edge from ground' property of your rack system. It defaults to 1m, which may be too high for racks placed on top of buildings.
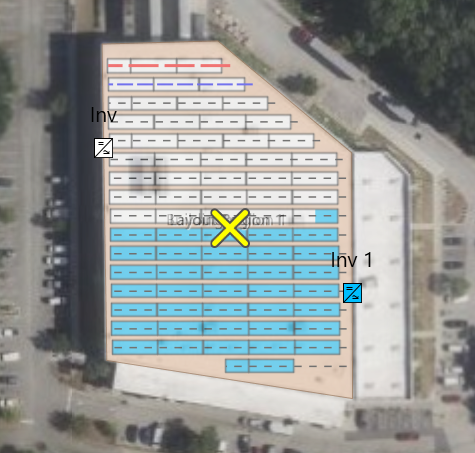
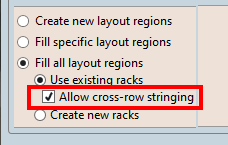
When adding inverters and strings, choosing the 'Allow cross-row stringing' option may help fill all the racks with strings.
Choosing this option does mean you will need to run the 3D calculation (cross-row stringing is not supported in the 2D calculation).
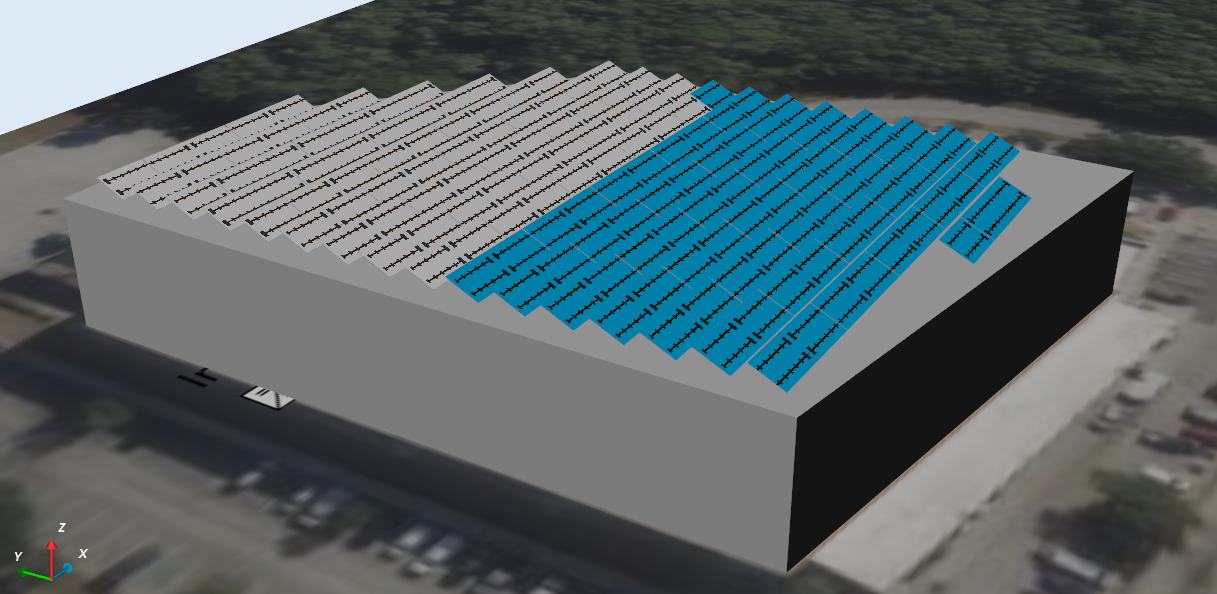
Viewing the map in 3D mode shows the racks placed on top of the building:
Adding shading objects to a building
Any shading objects (3D models or shading regions) that are added within the bounds of a building region will automatically get placed on the building's roof. You don't need to add additional heights or offsets.
Go to the 'Shading Objects > Shading objects' task.
Add a shading region (or shading 3D model) on top of the building:
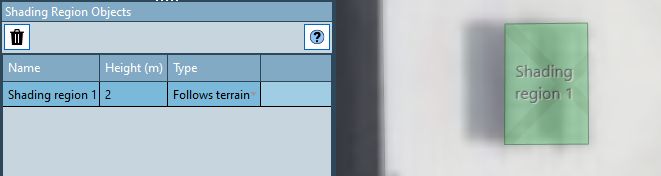
In this example, the height of 2m means that it will be extruded to a height of 2m above the building's roof.
Add additional exclusion regions around the shading objects if you want the shading objects to prevent the placement of racks (with auto-fill):
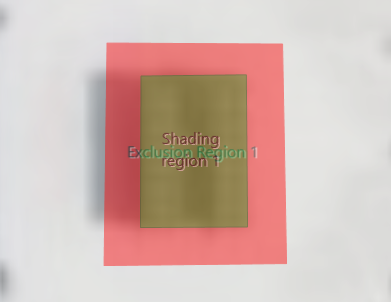
You may have to modify the locations of the racks and re-assign inverters and strings with the updated arrangement.

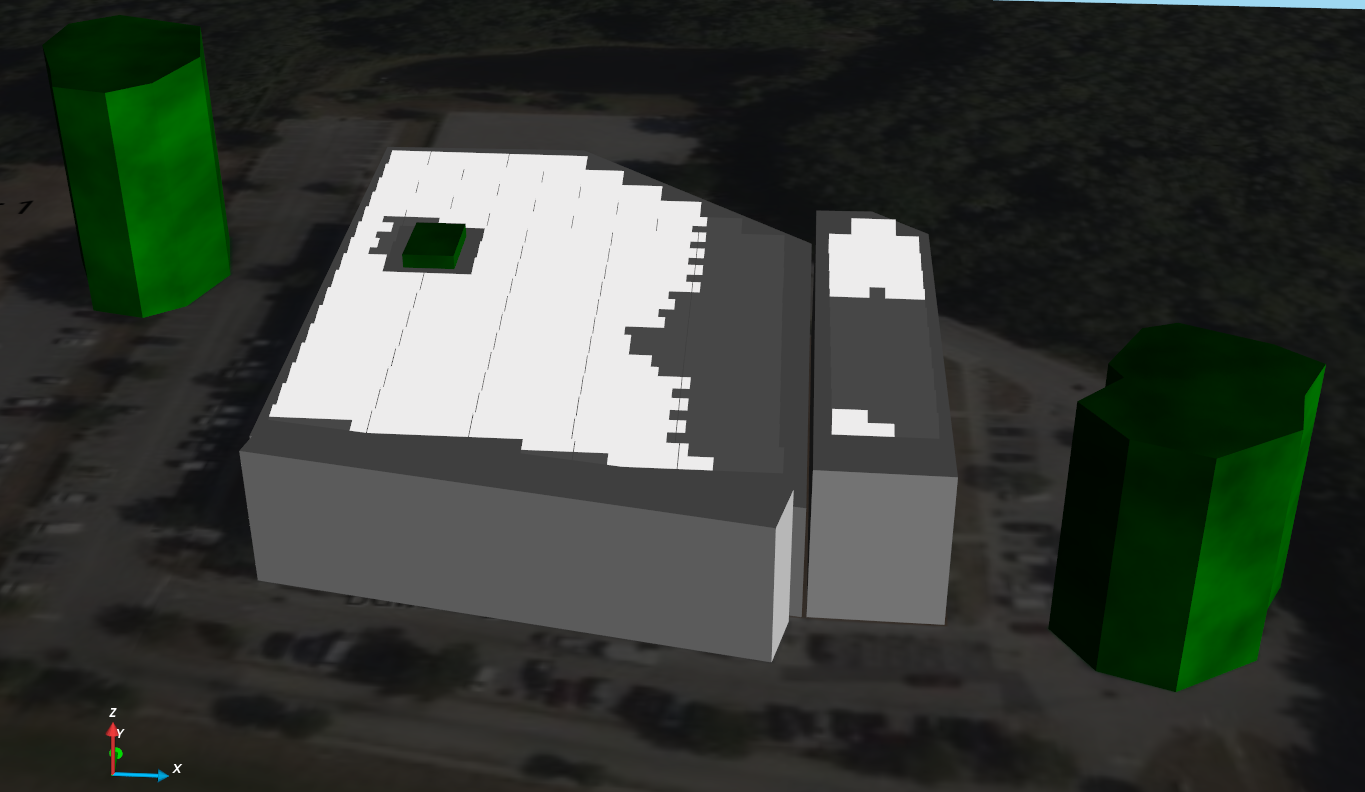
Viewing in 3D you can see the shading object placed on the roof amongst the racks:
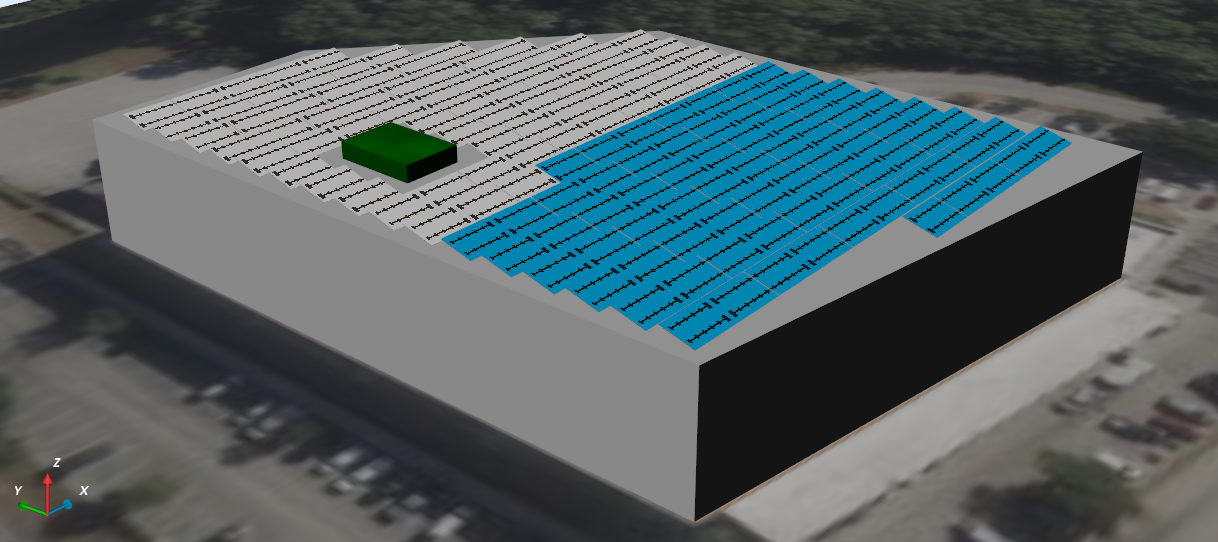 (click to enlarge)
Go to the 'Design layout > Review shading' task, run the shading calculation and view the map in 3D.
This allows to you view the shading effects on the modules from any shading objects and other buildings.
 (click to enlarge)