Export to PVsyst
The Export to PVsyst functionality allows you to use the setup and layout tools in SolarFarmer to create a workbook, then export this to generate a PVsyst project. You can then import this project into PVsyst, verify the settings/parameters and run the calculation via PVsyst. Though obviously you can run the project in SolarFarmer too.
Important things to note before laying out a site
| Fixed-tilt rack layouts are supported. These are 3D layouts in PVsyst, including the ground terrain around the racks. |
|
| Single-axis tracker layouts are NOT currently supported | |
| Inverter blocks are NOT currently supported |
Before laying out the site
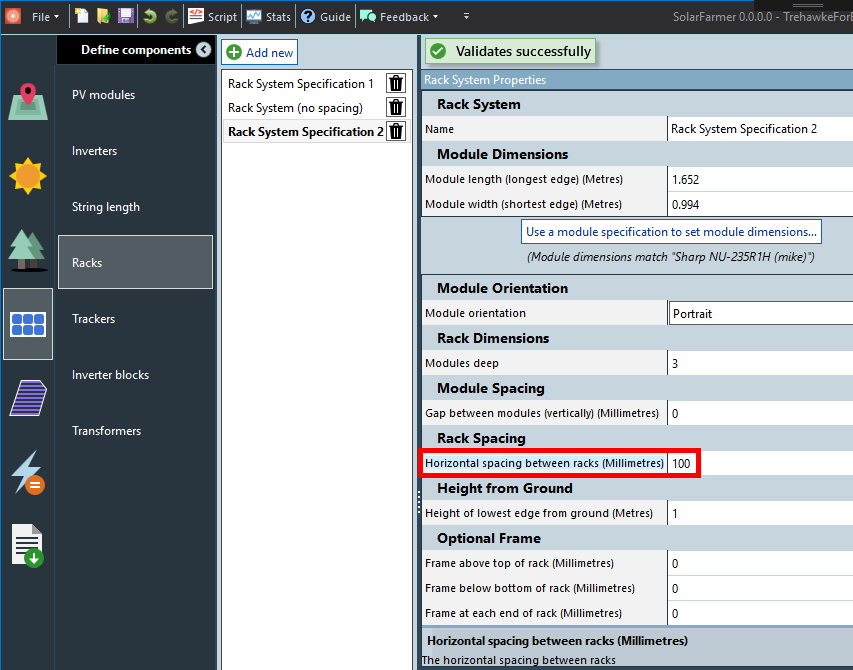
Make sure the horizontal spacing between racks is greater than 0. This defaults to 100m which should be ok. Otherwise the racks can intersect in the PVsyst shading scene, and it doesn't allow you to run the calculation.
Go to the 'Define components → Racks' task and check the 'Horizontal spacing between racks' property:
Make sure that the inverter spec and module specs that you use come from imported PAN and OND files.
These are stored in the SolarFarmer workbook and then exported directly to the PVsyst project. So manual modifications to any module or inverter specification parameters are NOT currently exported to PVsyst.
Make sure the strings fit exactly on one rack. Ideally using straight strings with no 'folds' in them. This helps replicate the same in PVsyst.
The solar (met) data it exports is the one selected in the calculation settings ('Calculate energy → Setup yield calculation') page. If you import multiple solar resources in SolarFarmer, make sure you choose the one you want exporting in the calculation settings.
The export targets PVsyst version 6.75.
Using the UI Dialog
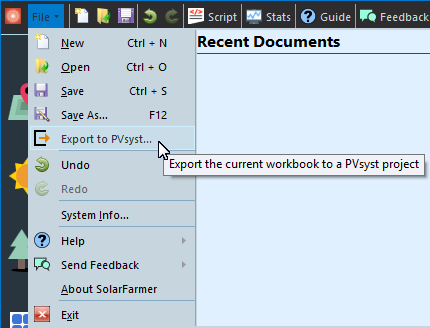
Click on the 'File → Export to PVsyst...' menu option
This launches the Export to PVsyst dialog:
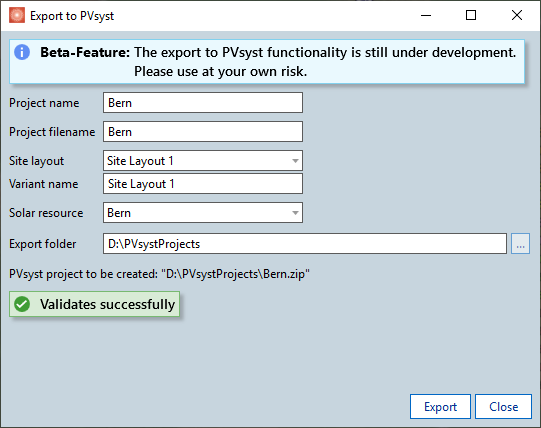
Any validation errors will be listed here. The main thing is to make sure the site layout is the one you want to export (it defaults to the visible layout) and you should set the folder that the PVsyst .zip project will be saved.
The Project name is separate to the Project filename so you can use invalid file characters (such as ", <, >, :") as part of the project name if you wish.
The solar resource data must be a year's worth of hourly data (e.g. TMY data). PVsyst cannot handle non-hourly intervals or multi-year.
After a few seconds, File Explorer in windows should open at the folder with the output file selected.
Using Scripting
You can perform the same functionality as the UI dialog using the scripting in SolarFarmer.
This could be useful if you are generating multiple site layouts using the specify site functionality and then want to export each one to PVsyst.
Launch the script editor window (click the 'Script' button in the application title bar):

It creates a default new script.
In the Execute() function, add the Toolbox.Export.ExportToPVsyst() function:

You'll see it takes 6 parameters that mirror those in the UI dialog:
| string | projectName | The name of the project (can contain any characters) |
| string | projectFileName | The file name to export (can't contain invalid file path characters) |
| SiteLayout | sitelayout | The site layout to export |
| string | variantName | The name to give to the variant for the layout in PVsyst |
| SolarResource | solarResource | The solar resource to export (must be a year's worth of hourly data (e.g. TMY)) |
| string | exportFolderPath | The folder to save the created .zip file in |
Fill these in as in the UI. Something like this:
public void Execute()
{
    // Select the site layout to export
    SiteLayout siteLayoutToExport = Workbook.Domain.SiteLayouts.FirstOrDefault(
        s => s.Name == "Site Layout 1");
    SolarResource solarResource = Workbook.Climate.SolarResources.First();

    // Call the ExportToPVsyst function
    Toolbox.Export.ExportToPVsyst(
        "Bern", "Bern", siteLayoutToExport, "Site Layout 1", solarResource,
        @"D:\PVsystProjects");
}
Save the script (give it a name first) and run the script.
Any validation errors will appear in the Results tab of the script editor. Otherwise it should confirm that the PVsyst project has been created.
Importing the Project into PVsyst
Using one of the methods above, you should have a .zip file that contains files for the PVsyst project.
Launch PVsyst
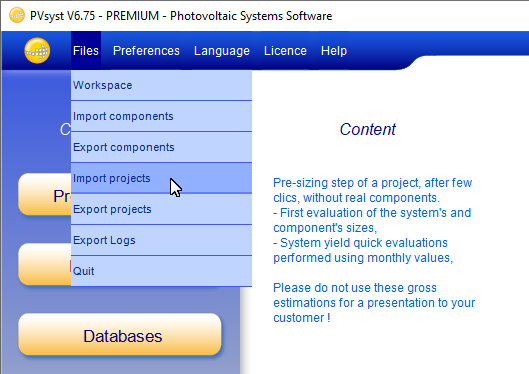
Choose the 'Files → Import projects' menu option from the main application dialog:
The 'Import projects tool' dialog appears.
Click the 'Browse...' button and select the .zip file that you exported from SolarFarmer.
Click the 'Import' button to import the files from the archive (if any warnings to overwrite appear, just click 'Yes' to them).
Dismiss the 'Success' dialog that appears and exit the 'Import project tools' dialog.
View the project design (click on 'Project design' and then 'Grid-Connected' buttons)
Site Details
Click on the Site → View site details menu option to view the site details.
The site name, location, altitude, time zone and country have been set from the SolarFarmer workbook.
The met data has been set from the solar resource data in SolarFarmer.
Project Settings
Click on the Project settings button to view the 'Project settings' dialog.
The albedo values should be filled in from SolarFarmer. Other settings should remain the same.
System Variant
One variant will be exported. This represents the site layout you selected in SolarFarmer.
Orientation
Click on the Orientation button to see the 'Orientation' dialog.
- A 'Fixed Tilted Plane' field type has been chosen. The Plane Tilt and Azimuth are set from the first layout region in the SolarFarmer site layout.
Horizon
Click on the Horizon button to see the Horizon dialog
- The horizon data has been imported into PVsyst.
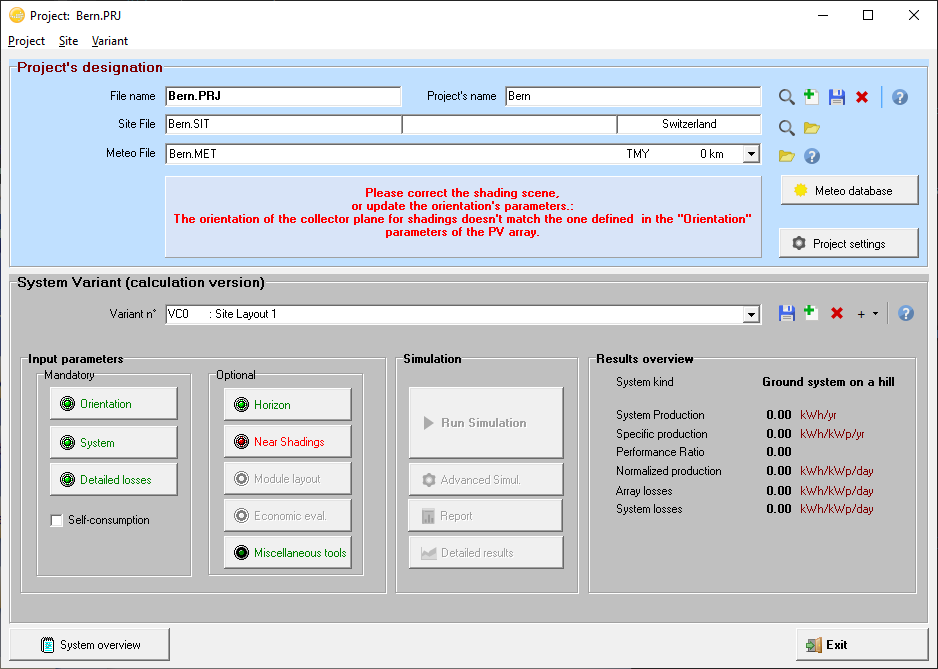
Near Shadings
Click on the Near Shadings button to see the 'Near Shadings definition' dialog.
There may be the following error about the orientation parameters needing updating:
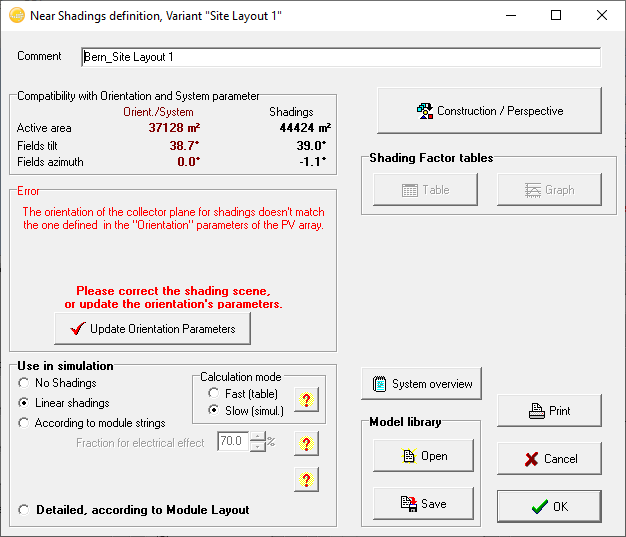
Click on the 'Update Orientation Parameters' to update the orientation (it should do it automatically)
3D Layout
- Now click on the Construction / Perspective button to see the layout in 3D:
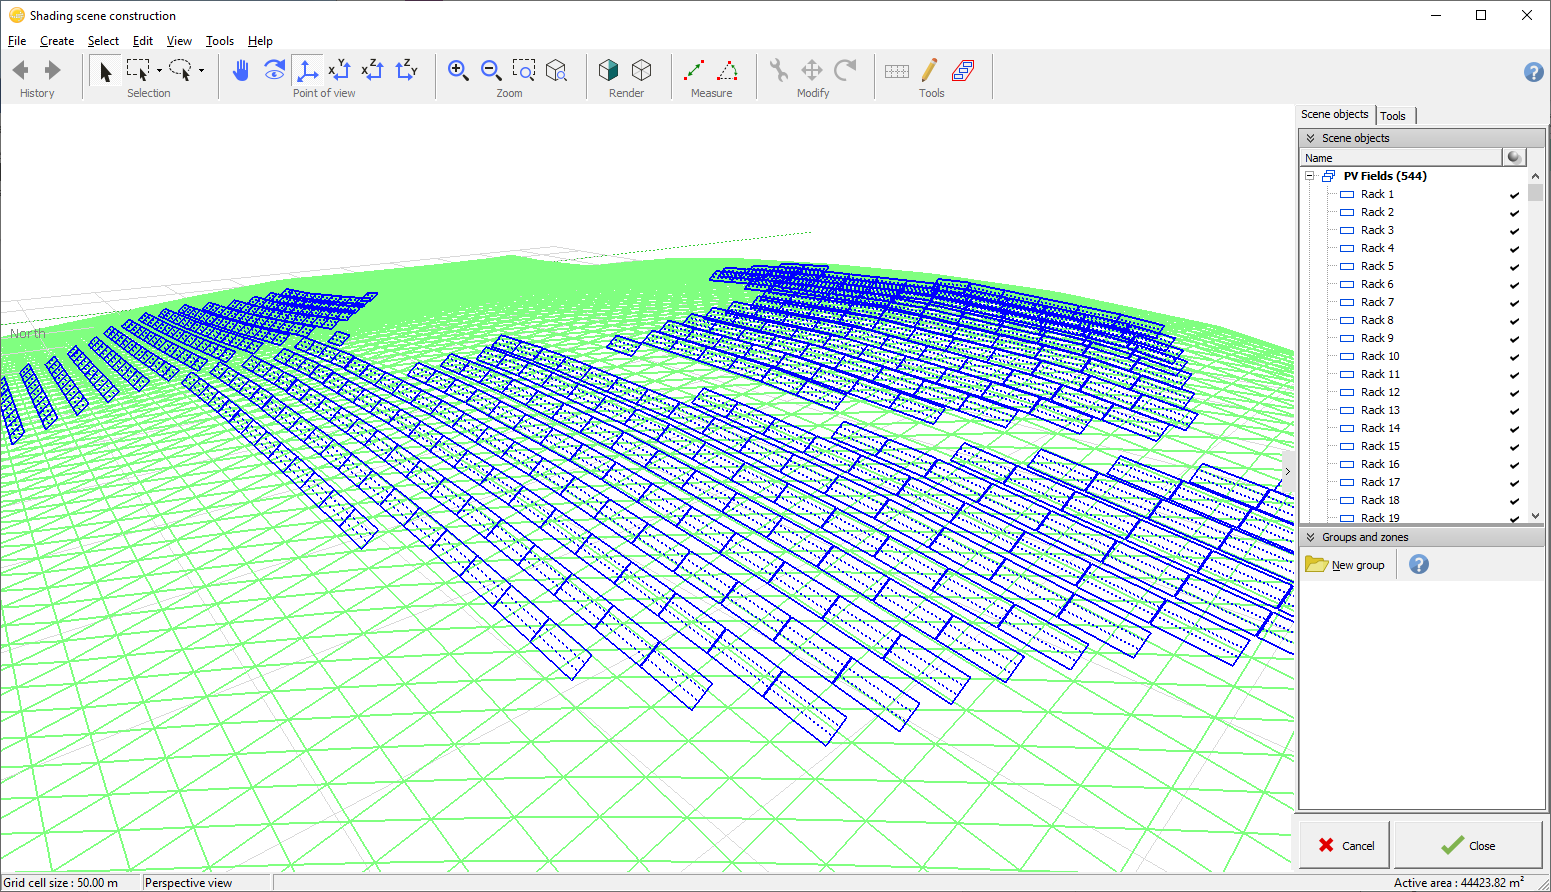 Each rack is individually laid out, orientated the same as it is in SolarFarmer along the terrain.
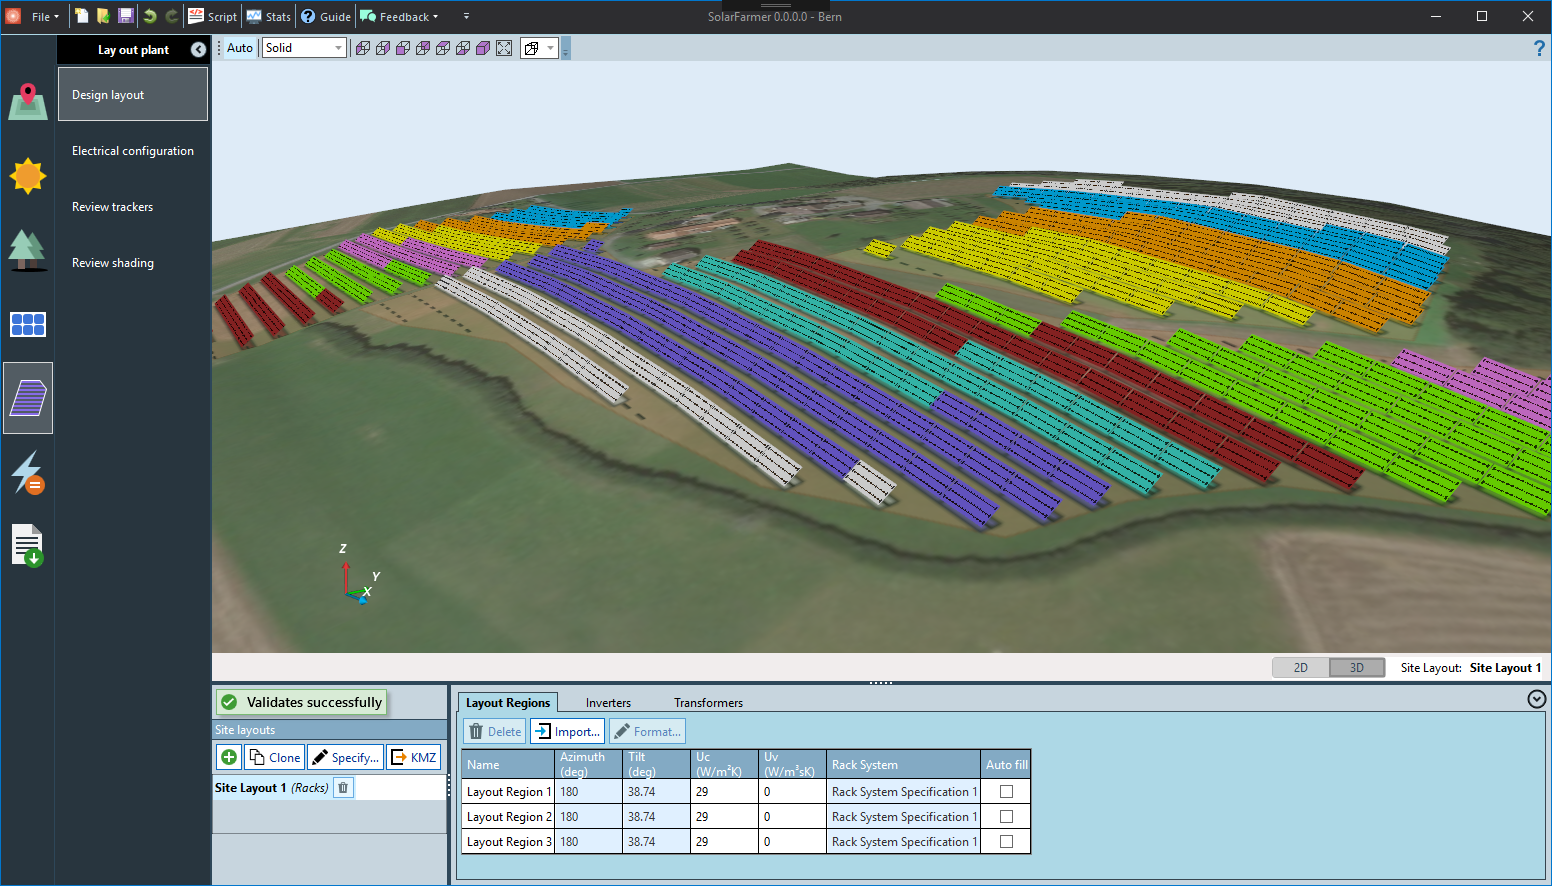
Here is the equivalent layout in SolarFarmer:
If you make changes to the 3D layout in PVsyst you need to set 'Default spacing between modules' to 0.00, otherwise it will default to 0.02 -- creating erroneous results when you save the project in PVsyst after making changes.
To do this: from PVsyst's main dialog, click the 'Preferences → Edit hidden parameters' menu option:
Choose the 'Miscellaneous: Meteo, Simulation,...' category and change both the "Shadings: Default spacing between modules" and "Shadings: Shed field default frame margin" to 0.00.
Module String Definitions
The module string definitions have been replicated as much as they can.
Strings in SolarFarmer:
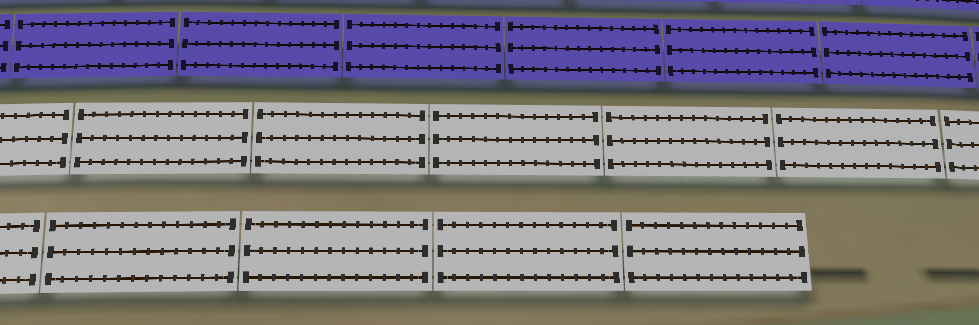
Equivalent module string definitions in PVsyst:

Shading Factors
PVsyst will have to compute the shading factors (these are not exported) which may take some time.
Grid System Definition
Click on the System button to show the 'Grid system definition' dialog.
There will be one or more sub-arrays defined, depending on the combination of module and inverter specifications and string lengths in your SolarFarmer site layout.
Detailed Losses
Click on the Detailed losses button to show the 'PV field detailed losses parameter' dialog.
Some of these losses have been filled in by the SolarFarmer export. Please check these thoroughly.