Generating Tracker Positions
This mini-tutorial will show you how to generate tracker positions from an existing layout. This can be useful if you would like to use custom tracker rotations in a layout that you generate in SolarFarmer.
It can be used in conjunction with the Using custom tracker rotations mini-tutorial that uses custom rotations (that you provide) for these imported trackers - which are then used in the energy calculation rather than the automatically calculations rotation values.
Tip
Please get in touch (send an email to solarfarmer@dnv.com) if you need assistance, especially if you're not familiar with C# scripting.
Requirements
In order to use this functionality you need a complete site with the modules strung to the inverters. You may follow any of the Step-by-step Tutorials in SolarFarmer or design your own site.
1. Add the TrackerShared library to your workbook
Various functions used in the sample scripts below use helper functions that are provided in the TrackerShared C# user library. This is a file supplied in the SolarFarmer installation folder.
You'll need to add this user library to your workbook.
To do this:
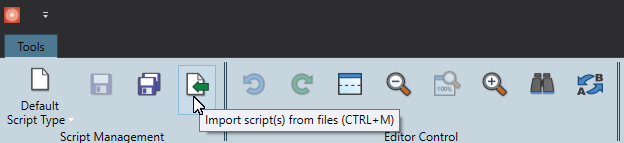
- Open the Scripting Editor and click on the 'Import Scripts from Files' button:
- Find the folder you installed SolarFarmer and select the file
"C:\Program Files\DNV\SolarFarmerversion number\Scripts\Trackers\TrackerShared.cslib" - The 'TrackerShared' User Library script should be loaded into the workbook and appear on the left-hand side. You don't need to look at the contents (but it is recommended if you want to learn!).
2. Generate tracker information and export to a file
The following code snippet is a generic implementation to export the tracker locations of the currently visible layout in the user interface, and produce a CSV file with the following 7 column headers:
Name, X (north), Y (north), Z (north), X (south), Y (south), Z (south)
followed by one row for each tracker.
The trackers in the CSV file will be added in a similar order than the inverters where they are strung to. Within the same inverter, the trackers will start from south to north and from west to east. For example, if SolarFarmer's Specify Site Layout Tool were used to generate the layout of north-south oriented single-axis trackers, the order of the trackers in the CSV file would start from the bottom left of the site layout as observed in the 2-Dimensional view, and moving north along the tracker row before moving to the bottom tracker of the next tracker row in the right/eastern position.
The X and Y coordinates of the trackers are in metres and are in the same projection (e.g., UTM Zone 30) as the projection in your workbook. The Z coordinate corresponds to the trackers height above sea-level.
Create a new script (default type), copy the code snippet below and define your output file before the first line of the snippet (e.g., string csvFilePathToSave = @"C:\Temp\trackersLocations.csv";).
When you run the script, this will produce a CSV file in the specified output directory with all the tracker positions.
// Get a HashSet of all the rack Ids used by strings of the inverters
HashSet<int> rackIds = new HashSet<int>();
foreach (InverterInstance inverter in Workbook.Domain.VisibleSiteLayout.InverterInstances)
{
    foreach (InverterInputInstance inverterInput in inverter.InputInstances)
    {
        foreach (ModuleString moduleString in inverterInput.ModuleStrings)
        {
            foreach (ModuleIndex moduleIndex in moduleString.ModuleIndexes)
            {
                rackIds.Add(moduleIndex.RackInstanceId);
            }
        }
    }
}

// Create a dictionary of RackInstanceInfo objects, keyed by RackId (for quick lookup)
SiteLayout siteLayout = Workbook.Domain.VisibleSiteLayout;
Dictionary<int, RackInstanceInfo> rackInfoDictionary
    = siteLayout.RackInstanceInfos.ToDictionary(r => r.RackId, r => r);

// Define the resulting TrackerInfo object
List<TrackerInfo> trackerInfos = new List<TrackerInfo>();
int trackerId = 1;

foreach (int rackId in rackIds)
{
    RackInstanceInfo rackInfo = rackInfoDictionary[rackId];
    Quad quad = rackInfo.RackQuad;

    Vector3D halfVectorAlongWidth = Vector3D.Multiply(quad.Point2 - quad.Point1, 0.5);
    Point3D midSouth = quad.Point1 + halfVectorAlongWidth;
    Point3D midNorth = quad.Point4 + halfVectorAlongWidth;

    double northX = midNorth.X;
    double northY = midNorth.Y;
    double northZ = midNorth.Z;
    double southX = midSouth.X;
    double southY = midSouth.Y;
    double southZ = midSouth.Z;

    trackerInfos.Add(new TrackerInfo(trackerId.ToString(), new Point3D(northX, northY, northZ), new Point3D(southX, southY, southZ), trackerId));

    trackerId++;
}

// Save the tracker position file to a file
UserLibs.TrackerShared.Utils.OutputTrackerInfoToFile(trackerInfos, csvFilePathToSave);

Toolbox.Log("Script completed successfully.");
3. Create and populate a new layout region (optional)
Once you have exported the CSV with the tracker locations. You may want to bring them back into SolarFarmer to use custom tracker rotations. You can use the code snippet below to do so, which is equivalent to step 4 in Importing Tracker Positions.
Important
Before being able to add new trackers, inverters and modules to your site layout you will need to define their specifications in your SolarFarmer workbook. Do this now if you have a blank workbook.
- If not already done, set the site's location (and map projection) in the workbook for the site
- Import a PAN file
- Import an OND file
- Define a tracker template that is the same size and dimensions as the one in your input file
- Define a transformer specification
The following code snippet selects the module, inverter, tracker template and transformer specifications to use in the layout region, then fills it with the trackers, adds a transformer and assigns inverters and strings.
// Create a new layout region and use generic layout to fill it.
SiteLayout siteLayout = Workbook.Domain.VisibleSiteLayout;
ModuleSpecification moduleSpecification = Workbook.ComponentLibrary.ModuleSpecifications.First();
InverterSpecification inverterSpecification = Workbook.ComponentLibrary.InverterSpecifications.First();
TrackerSystemSpecification trackerSystemSpecification = Workbook.ComponentLibrary.TrackerSystemSpecifications.First();
TrackerTemplateSpecification trackerTemplateSpecification = Workbook.ComponentLibrary.TrackerTemplateSpecifications.First(t => t.TrackerSystemSpecification == trackerSystemSpecification);
TransformerSpecification transformerSpecification = Workbook.ComponentLibrary.TransformerSpecifications.First();
const int stringLength = 29;
const double dcAcRatio = 1.2;
const double Uc = 31.0; // (constant heat transfer)
const double Uv = 1.6;  // (convective heat transfer)

UserLibs.TrackerShared.Utils.CreateAndFillLayoutRegion(
    trackerInfos,
    siteLayout,
    stringLength,
    dcAcRatio,
    Uc,
    Uv,
    moduleSpecification,
    inverterSpecification,
    trackerTemplateSpecification,
    transformerSpecification);
When you run the script you should see a layout region filled with the trackers from your input file, which should be equivalent to the one you exported. Each tracker should be placed on a row, inverters should be added and strings should be placed on the trackers.