Specify Site Layout Tool
The Specify Site Layout Tool in SolarFarmer allows you to:
- Create a site layout (create new layout regions or use existing layout regions)
- Fill this site layout with racks or trackers
- Automatically add modules and strings to central inverters (that are automatically created and added)
- Specify parameters in one or more sub-arrays, to have different properties in different parts of the site.
By specifying several parameters in one or more sub-arrays you can quickly produce several site layouts with slightly different properties (e.g. pitch, tilt, module specification).
Using the UI
Go to the 'Lay out plant → Design layout' task
In the 'Site Layouts' panel in the bottom left click the 'Specify...' button
to launch the Specify Site Layout dialog: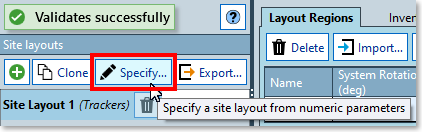
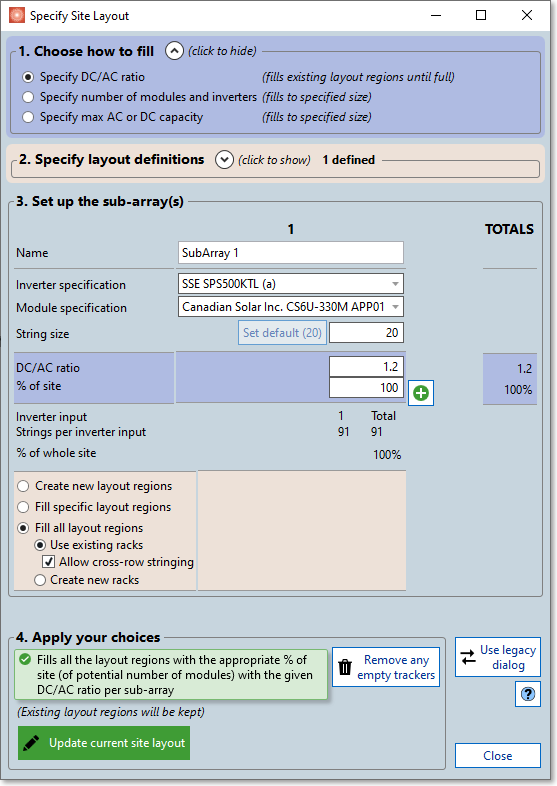
The dialog is split into 4 sections. We'll go through each in turn:
1. Choose how to fill

You are presented with 3 options for filling layout regions:
Specify DC/AC ratio
Specify a DC/AC ratio and a percentage of site for each sub-array. It will fill the layout regions you specify (either specific ones or all of them) until they are full.
Specifying the percentage of the site to fill for each sub-array allows you to fill the site with varying proportions from each sub-array should you choose. It uses the count of modules to determine the percentages.
Specify number of modules and inverters
Specifying the number of modules and inverters for each sub-array will limit the capacity of the site by these amounts, assuming there is sufficient space in the layout regions to place the modules.
It automatically calculates how many strings per inverter input there will be, and if the numbers don't quite all divide, it will round up (over-size) to ensure equal DC/AC ratio in all the inverters in the sub-array. In this case there may end up being more modules than required, so please make sure the number of modules, inverters and the string size all divide cleanly.
Specify max AC or DC capacity
Specifying the max AC or DC capacity for each sub-array will limit the fill capacity of each sub-array by that amount. You have to specify a DC/AC ratio too.
Depending on the string size, and inverter and module specifications, it will do its best to accommodate your desired size. But if it can't do it exactly it will slightly over-size in order to get the same number of strings per inverter for all the inverters. So the actual DC power or AC output may not exactly be your desired value.
2. Specify layout definitions
Layout definitions are used to define parameters for creating new layout regions, or filling existing layout regions with new racks or trackers.
Specify the layout definitions in this section, and use them in the sub-array section below.
Example layout definitions for use with fixed-tilt racks:

For this example, the workbook contains bifacial modules, so the 'Shade Factor', 'Transmission Factor', and 'Mismatch Factor' columns (relating to bifacial properties) are visible. This won't be visible if none of your module specifications are bifacial.
Example layout definitions for use with single-axis trackers:
![]()
For this example, the workbook contains bifacial modules, so the 'Shade Factor', 'Transmission Factor', and 'Mismatch Factor' columns (relating to bifacial properties) are visible. This won't be visible if none of your module specifications are bifacial.
Adding/Deleting layout definitions
You can add new layout definitions (it will make a copy of the last in the list) and delete existing ones (that you have selected), but pressing the 'Add new' and 'Delete' buttons. Though there always needs to be one, so you can't delete the last one.
Using layout definitions
In the sub-array section below, when choosing to creating new layout regions, or if filling layout regions and you choose to create new racks or trackers, a drop-down containing the names of the layout definitions will be visible. Choose the layout definition that you wish to be used.


3. Set up the sub-array(s)
In the Specify Site Layout Tool (legacy) there was just one fill option for the whole site (e.g., the same DC/AC ratio, the same module/inverter specification). You couldn't fill the site with different fill options, or specify which layout regions got updated. It updated the whole site with just one fill option.
Using sub-arrays in this tool means that you can fill the site with a variety of fill options, and choose to just fill in specific layout regions and not the whole site.
Adding and deleting sub-arrays
There is always one sub-array in the dialog. For a lot of use cases this will be sufficient and this will replicate the functionality of the legacy dialog.
Adding a new sub-array
To add a new sub-array press the green '+' button to the right of existing sub-arrays:
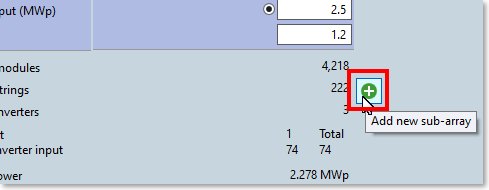
The last sub-array in the list will be copied as a new one.
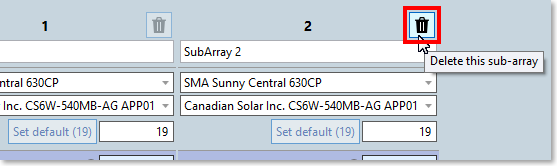
Deleting a sub-array
To delete a sub-array (when there are two or more) hover over the delete button to the top-right of the sub-array you wish to delete and press it.
Inputs
Each sub-array has various inputs:
Common inputs
The following inputs are common to all sub-arrays, no matter how you're choosing to use them:
| Name | The name you wish to give to the sub-array. If you choose to create new layout regions this name will be used for the layout region name. |
| Inverter specification | The inverter specification to use for this sub-arrays. Different sub-arrays can use different inverter specifications. |
| Module specification | The module specification to use for this sub-arrays. Different sub-arrays
can use different module specifications.
Note that the racks or trackers that the modules from this sub-array are placed on must be size-compatible with the module specification you choose. If not, a validation error will show. |
| String size | The string size (length) to use for this sub-array. |
Inputs dependent on the 'how to fill' choice
The inputs with a blue background for each sub-array change depending on what you have chosen in the '1. Choose how to fill' option at the top.
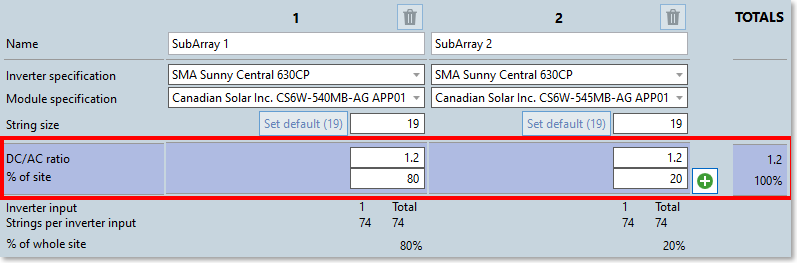
| Specify DC/AC ratio |
|
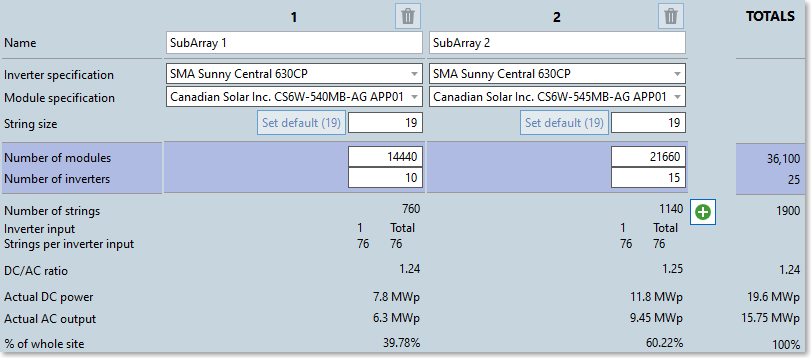
| Specify number of modules and inverters |
|
| Specify max AC or DC capacity |
|
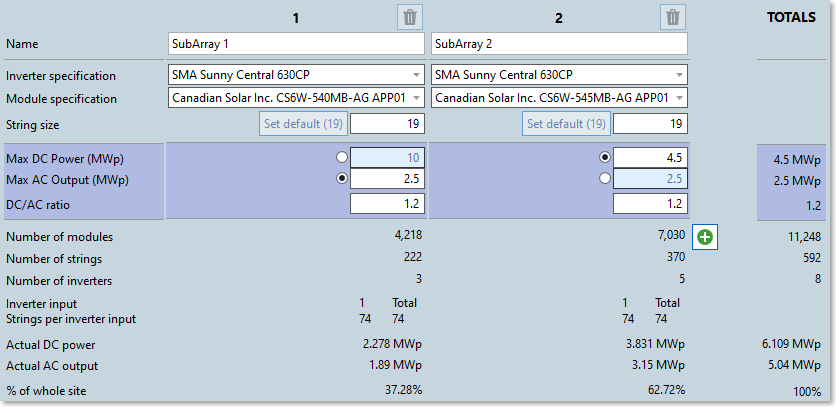
Calculated values
As you enter and edit the inputs mentioned above, various other read-only calculated values are updated and shown below. These are to help you understand how the inputs combine and confirm that you will get your expected results.
Layout region fill choices
There are various ways you can choose to create or fill layout regions with the choices you have made in your sub-arrays:
Create new layout regions
This choice is only available if you choose 'Specify number of modules and inverters' or 'Specify max AC or DC capacity',

You'll need to choose a layout definition for each sub-array. You can choose different layout definitions for different sub-arrays.
When you update the site layout, all existing layout regions will be removed and a new layout region for each sub-array will be added (approximately square-shaped) containing the capacity specified in the sub-array, and filled with the layout definition you chose.
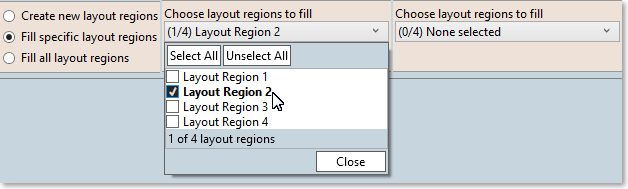
Fill specific layout regions
You can choose to only fill specific layout regions in the site layout, rather than create new ones or fill all of them.
You can do this per sub-array, and choose none, one or several layout regions to fill, giving you finer control over what parts of the site are filled.
Click the drop-down for each sub-array to reveal the list of layout regions, and select the ones you wish to fill:
Once you have chosen one or more, an option below appears letting you choose to use either existing racks/trackers, or create new ones (with a layout definition to choose):

If you select the same layout region to fill with multiple sub-arrays, it will do some validation checks to make sure things are compatible. And when filling, will start with the left-most sub-array when filling the layout region.
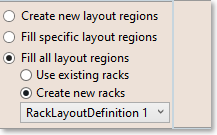
Fill all layout regions
Often the easiest way to fill is just to fill all the existing layout regions in the site layout. With this option you can choose to use any existing racks/trackers, or create new ones (selecting a layout definition):
If you have more than one sub-array, it will start with the left-most sub-array and work its way through them, left to right, depending on which fill-option you chose.
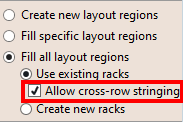
'Allow cross-row stringing' option
By default, when laying out strings, SolarFarmer does not allow strings to cross multiple rows of fixed-tilt racks or trackers. Empty gaps are left at the end of rows if another complete string cannot be added.
You can override this behaviour to allow cross-row stringing. This is particularly useful for smaller site layouts such as on buildings or in small fields where it's hard to fit complete strings on single rows.
There are two ways of specifying this in the Specify Site Layout tool:
Check the 'Allow cross-row stringing' checkbox when specifying a layout definition:

Check the 'Allow cross-row stringing' checkbox for the 'Use existing racks/trackers' options when deciding which layout regions to fill:
| Without cross-row stringing | With cross-row stringing |
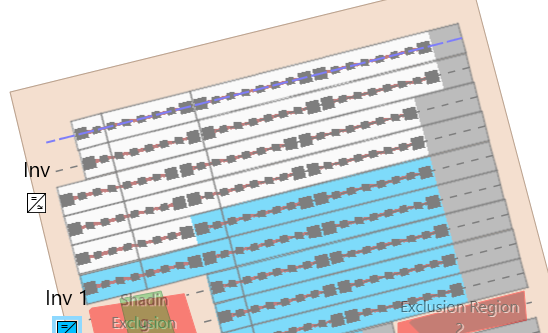 |
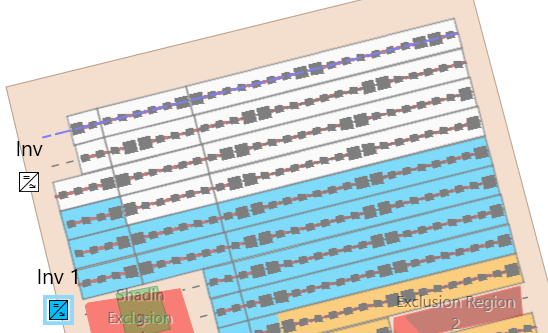 |
Important
If you use cross-row stringing you must use the 3D calculation (local or cloud).
Cross-row stringing is not supported by the 2D calculation (local or cloud).
This may be a consideration, depending on the size and characteristics of your site.
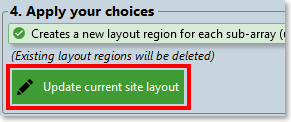
4. Apply your choices
Any validation errors will appear here in orange if the combination of your choices above are invalid. For example:


A summary of what will happen will appear in green if all is OK and it's ready to update the site layout:


Press the green 'Update current site layout' button once you are ready to start the update process.
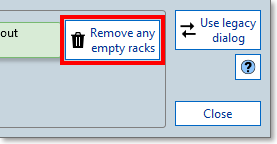
At any time press the 'Remove any empty racks/trackers' button to remove any currently completely empty racks/trackers from the current site layout.
Using Scripting
You can also employ the specify site layout functionality using scripting. In fact, using scripting harnesses its power enabling you to quickly generate multiple site layouts using parameter sweeps, creating potential site layouts to use for optimisation purposes.
See Specify Site for more details on using scripting for specifying site layouts.